Custom Edit controls let you replace a standard field input with a specialized control while keeping it integrated with PHPRunner Add and Edit pages.
This article explains the underlying plugin structure using ColorPicker and SignaturePad as practical examples. It covers the PHP and JavaScript parts of a control, adding CSS and other assets, passing settings, validation and installing the finished plugin in PHPRunner.
Looking for a faster way to create a new control? You can also use the PHPRunner custom Edit controls skill with ChatGPT to generate the PHP, JavaScript, CSS and supporting files for a new control. See Building a World Cup Prediction Challenge in PHPRunner, especially the section about creating custom Edit controls with ChatGPT.
How a custom Edit control is structured
A PHPRunner custom Edit control normally contains a PHP file and a JavaScript file. It may also include CSS, images and other supporting files.
A typical plugin may look like this:
The PHP part extends PHPRunner’s UserControl class and handles server-side setup and HTML generation.
The JavaScript part defines the browser-side control under Runner.controls.
Common plugin methods include:
- initUserControl() – initializes the control and passes settings to JavaScript;
- buildUserControl() – generates the HTML for the Edit control;
- addJSFiles() – loads additional JavaScript files;
- addCSSFiles() – loads stylesheets;
- addJSSetting() – passes server-side settings to the JavaScript control.
You can develop the plugin in any working folder and import it into PHPRunner when it is ready.
Installing a custom Edit control in PHPRunner
Once your plugin is ready, import it into PHPRunner.
- Open your project in PHPRunner.
- Proceed to Page Designer.
- Select a field and open its View As / Edit As properties.
- Click Install plugins in the lower-left corner of the dialog.
- Click Browse.
- Select either the plugin ZIP archive or the plugin PHP file from your working folder.
- Import the plugin.
Once imported, the custom control becomes available in PHPRunner and can be selected as the field’s Edit as type.
ColorPicker control
Let’s create a color picker that allows users to select a color instead of entering a hexadecimal value manually.
Create a working folder for the plugin, for example:
Create the basic plugin files in that folder:
If the control requires additional JavaScript, CSS, images or other assets, place those files in the plugin folder as well.
The ColorPicker example uses the jQuery miniColors component. Its source is available on GitHub.
Add JavaScript and CSS files
Use the plugin PHP class to load additional JavaScript files required by the control:
If JavaScript files need to be loaded in a particular order, you can specify a dependency:
Add the stylesheet in the same way:
These calls can be placed in the plugin’s addJSFiles() and addCSSFiles() methods.
Build the control
The buildUserControl() method generates the HTML for the control.
For example, the ColorPicker control can add a CSS class to its input:
The JavaScript side initializes the color picker:
this.valContId identifies the HTML input used by the control.
After importing the plugin into PHPRunner, select ColorPicker as the field’s Edit as type.
Display the selected color
On List and View pages, you may want to display the selected color visually instead of showing only its hexadecimal value.
Set the field’s View as type to Custom and use:
See the View as: Custom documentation for more information.
SignaturePad
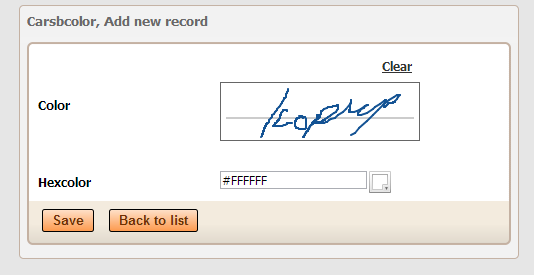
A SignaturePad Edit control collects signature data in the browser and saves the resulting image on the server.
The plugin needs to:
- generate the signature-pad interface;
- load the required JavaScript and CSS;
- collect the signature in the browser;
- submit the signature data with the form;
- convert the submitted data to an image on the server.
Build the control’s HTML
The buildUserControl() method outputs the signature-pad interface:
The canvas is used for drawing the signature, while the hidden field contains the value submitted with the form.
Convert signature data to an image
The signature data is submitted in JSON format. The server-side part of the plugin converts that data to a PNG image and prepares the value PHPRunner stores for the uploaded file.
The uploaded-file information is stored as structured JSON rather than only a filename.
A typical stored value looks like this:
Passing settings to a custom control
A reusable Edit control should accept project-specific settings instead of hardcoding every value.
For a SignaturePad control, useful settings include:
- width and height;
- background color;
- the folder where images are stored;
- whether the field is required.
The plugin can provide example initialization settings in sample.php:
The PHP part can read these settings in initUserControl() and pass values to JavaScript with addJSSetting() when necessary.
For example:
Make the signature required
In the JavaScript control:
Then enable the option in the initialization settings:
Set the width and height
Set the dimensions in the initialization settings:
The values can then be used while building the canvas:
Choose the folder for signature images
Set the folder:
Use the setting when creating the image:
Change the background color
Set the background color:
The example above represents white in RGB.
The JavaScript control can use the corresponding setting when initializing SignaturePad:
The same value can be used when generating the PNG on the server:
Creating custom Edit controls with ChatGPT
Understanding the PHP and JavaScript structure is useful when you need to customize a control, troubleshoot it or build specialized functionality.
You can also use ChatGPT together with the PHPRunner custom Edit controls skill to generate a new plugin.
In our World Cup 2026 tutorial, we created three custom Edit controls:
- ImagePicker;
- ImageDropdown;
- ImageChoice.
These controls follow the same basic plugin structure described above, with PHP, JavaScript and optional CSS and image assets.
The workflow is:
- download the PHPRunner custom Edit controls skill pack from the World Cup article;
- start a ChatGPT conversation and provide the skill;
- describe the control you want to create;
- review and test the generated PHP, JavaScript, CSS and supporting files;
- keep the completed plugin in a working folder or package it as a ZIP;
- in PHPRunner, open Page Designer and the field’s View As / Edit As properties;
- click Install plugins and import the completed plugin.
This gives you a quick way to create specialized controls while still allowing you to modify the generated PHP and JavaScript when you need more control.
For additional information about custom Edit controls, see the PHPRunner custom Edit control documentation.
Looks good – where’s the beta?
I tested this out and IT WORKS SUUUUUUUUUUPPPPPPPPPERRRRRRRRRRR NICE!!!!!!!!!!!!!!
Great Job Sergey!!
Very good, I was drifting away from using PHPRunner but I like the idea of plugins.
Would you be able to post a tutorial on how to use rating plugin?
I am planning to develop a an image gallery with the use of the asprunner and the image rating besides each image.
thanks
i can not Find help on adding plugins to asprunner.net
the included Help in asprunner.net is related to classic ASP.