You do not need to import an entire third-party website theme to reproduce its look in PHPRunner. A dashboard can be styled by combining Page Designer settings, fonts, chart options, code snippets and a small amount of CSS while keeping the generated application structure intact.
The example below starts with an existing dashboard design as inspiration and recreates the important visual ideas inside PHPRunner.
For inspiration, we will use the Material Dashboard design by Creative Tim. Here is the original design:

Before you start
When recreating a design, identify the few elements that make the biggest visual difference first: page width, spacing, typography, card and background treatment, and chart colors. Reproducing those elements usually gets you most of the way to the desired look without adding a large amount of custom CSS.
If you are starting a new project, also review the current built-in PHPRunner themes before creating a heavily customized theme from scratch. For example, the newer Harbor theme provides a more modern starting point for many applications.
1. Create a dashboard
Start by creating a dashboard with three rows and adding dashboard elements to them. In this example, the first two rows contain charts and code snippets, while the last row contains grids.
Use the Colors settings to customize the appearance of the dashboard elements. Here are the color settings used for the charts:

For code snippets, choose the Left icon style. The background color can be different for each snippet.
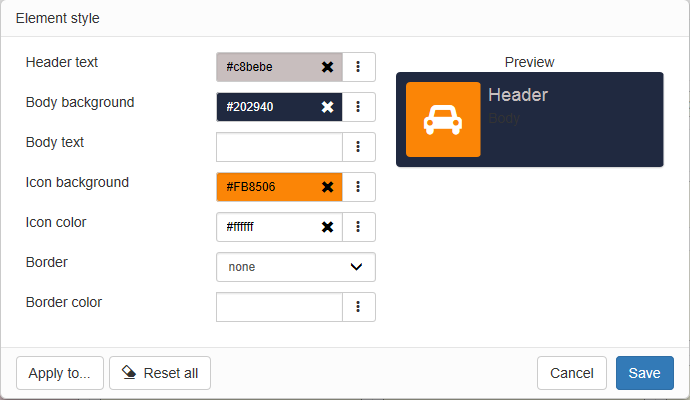
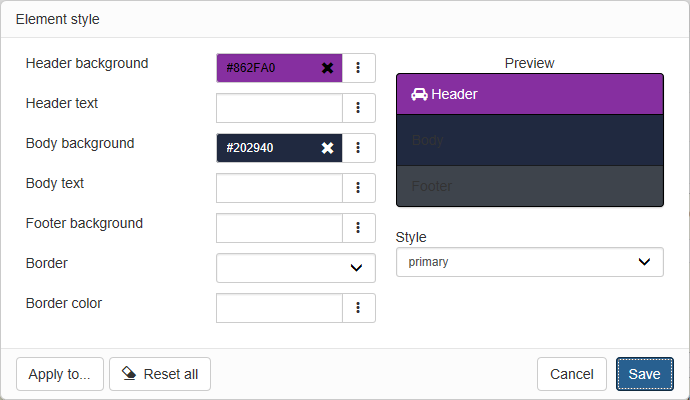
Here are the corresponding color settings for the grids. In this example, different grids use different header background colors.
2. Add code snippets
Code snippets can be used for dashboard cards that display summary information. Here is the code used for the first snippet:
The snippet contains several separate pieces of information. Each one is assigned its own CSS class, such as snip_title, so its appearance can be customized later with Custom CSS.
3. Customize fonts
PHPRunner lets you customize fonts directly in Page Designer. The original dashboard design uses the Roboto font, so we will use it here as well.
In Page Designer, open the List page used by the first dashboard grid. Select the grid fields and headers and set the font family to Roboto. Then select the header elements and adjust their font size. You can set a different font size for regular grid fields.
Repeat the same process for the other grids used on the dashboard.
4. Configure the top bar and sidebar
The top bar, sidebar and general application colors can be adjusted in Style Editor.
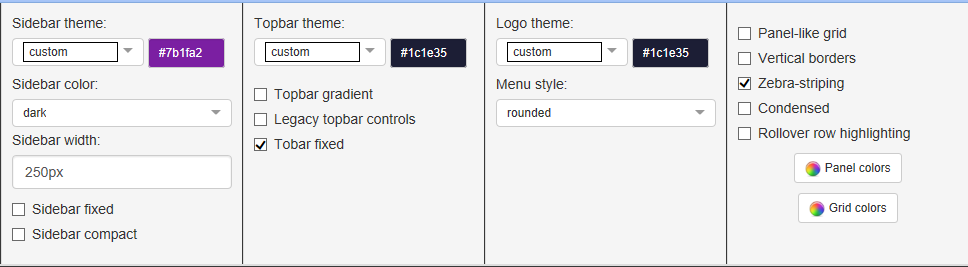
On the same screen, use the grid color settings to customize the appearance of grids.
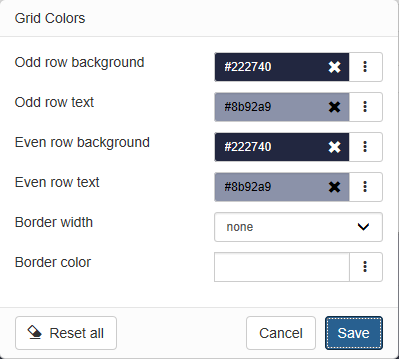
At this stage, we have used only built-in PHPRunner functionality and already have a dashboard that is fairly close to the target design.
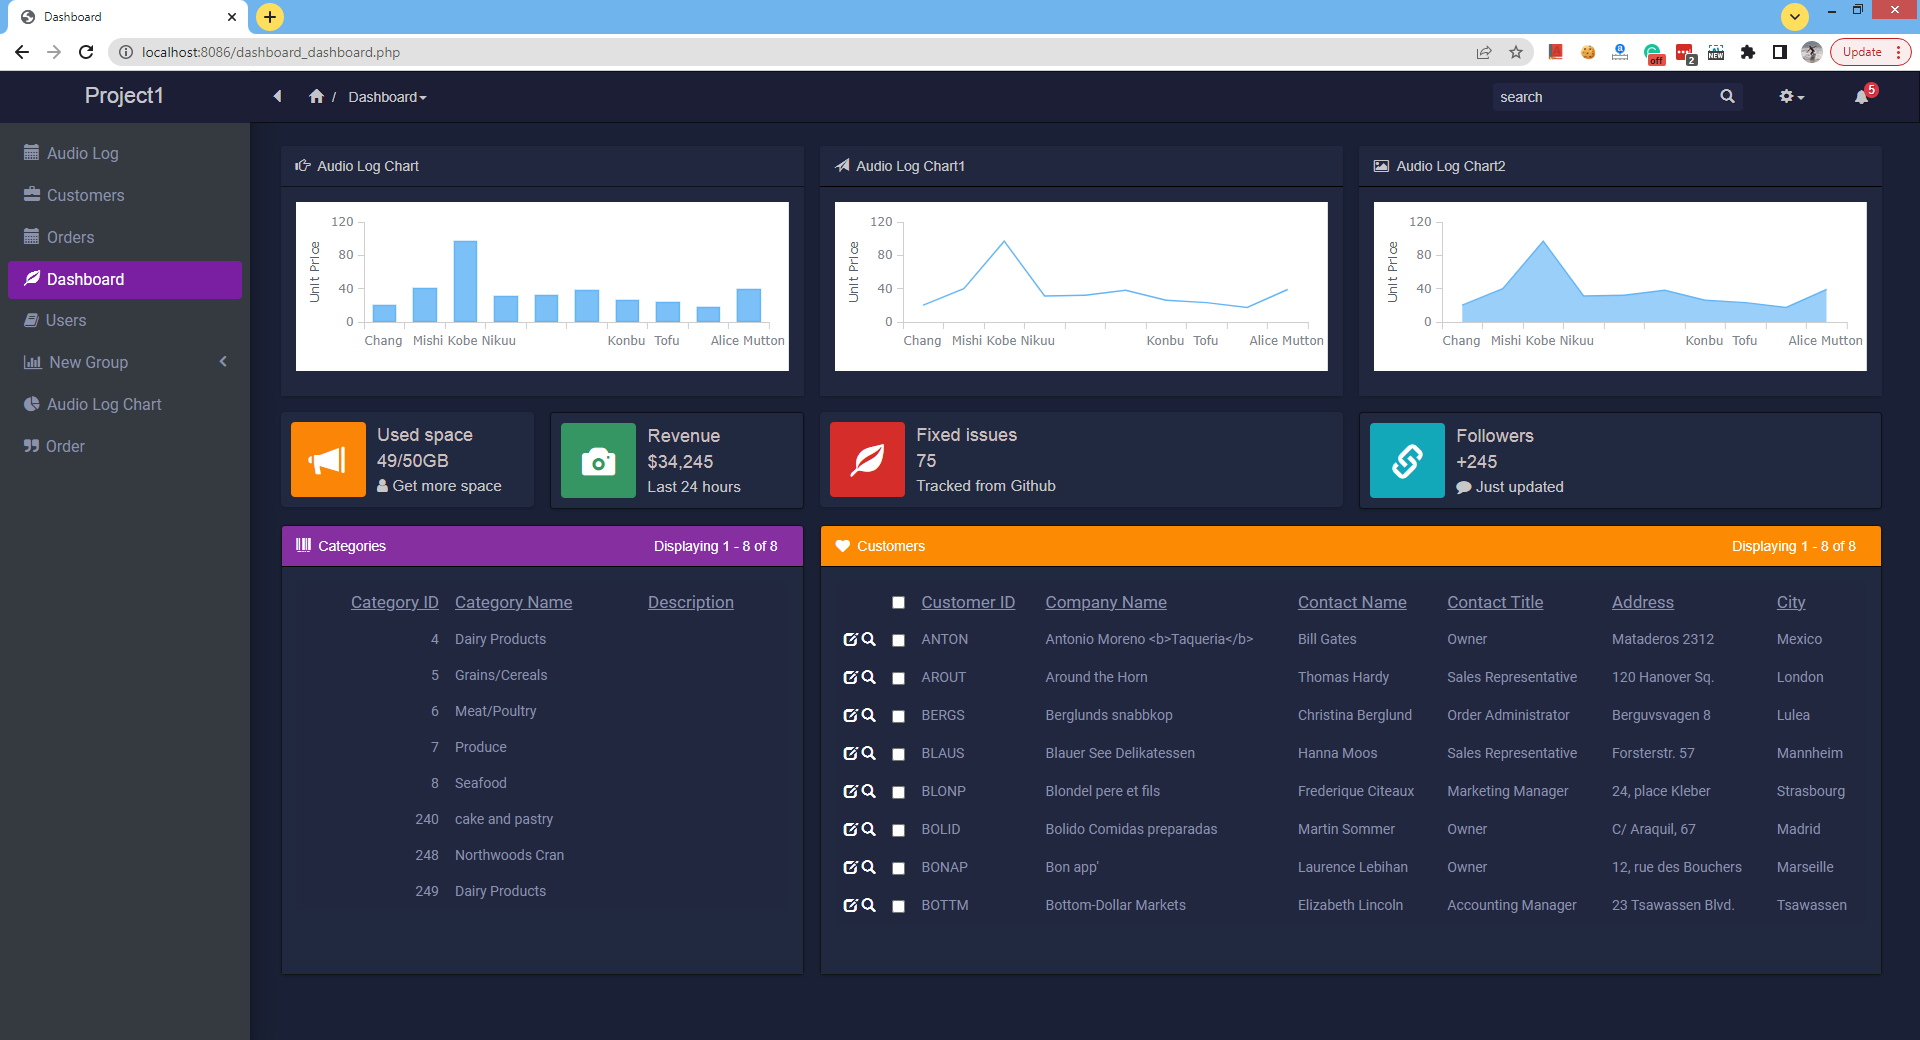
The remaining differences are mostly details: sidebar styling, chart colors, snippet typography and positioning, and some additional grid styling.
5. Customize charts
More advanced chart customization can be done in the ChartModify event. The following example changes the chart background, axis labels and series appearance.
You can use the same basic approach for the other charts and change individual settings such as the background color as needed.
Note: ChartModify is the correct place for advanced chart customization, but individual AnyChart methods can change between versions. If you are adapting an older example, verify the chart API calls against the AnyChart version included with your current PHPRunner project.
6. Add Custom CSS
Custom CSS can handle the remaining visual details. Add the CSS in Style Editor > Modify CSS.
The example below styles the page background, sidebar, dashboard grids and code snippets.
Some CSS selectors in this example, especially dashboard element IDs and selectors related to the sidebar, are specific to the project and PHPRunner interface used when the example was created. Inspect the generated page and adjust those selectors if necessary when applying the technique to a current project.
Final result
After combining the built-in theme and Page Designer settings with chart customization and a relatively small amount of CSS, the finished dashboard looks like this:
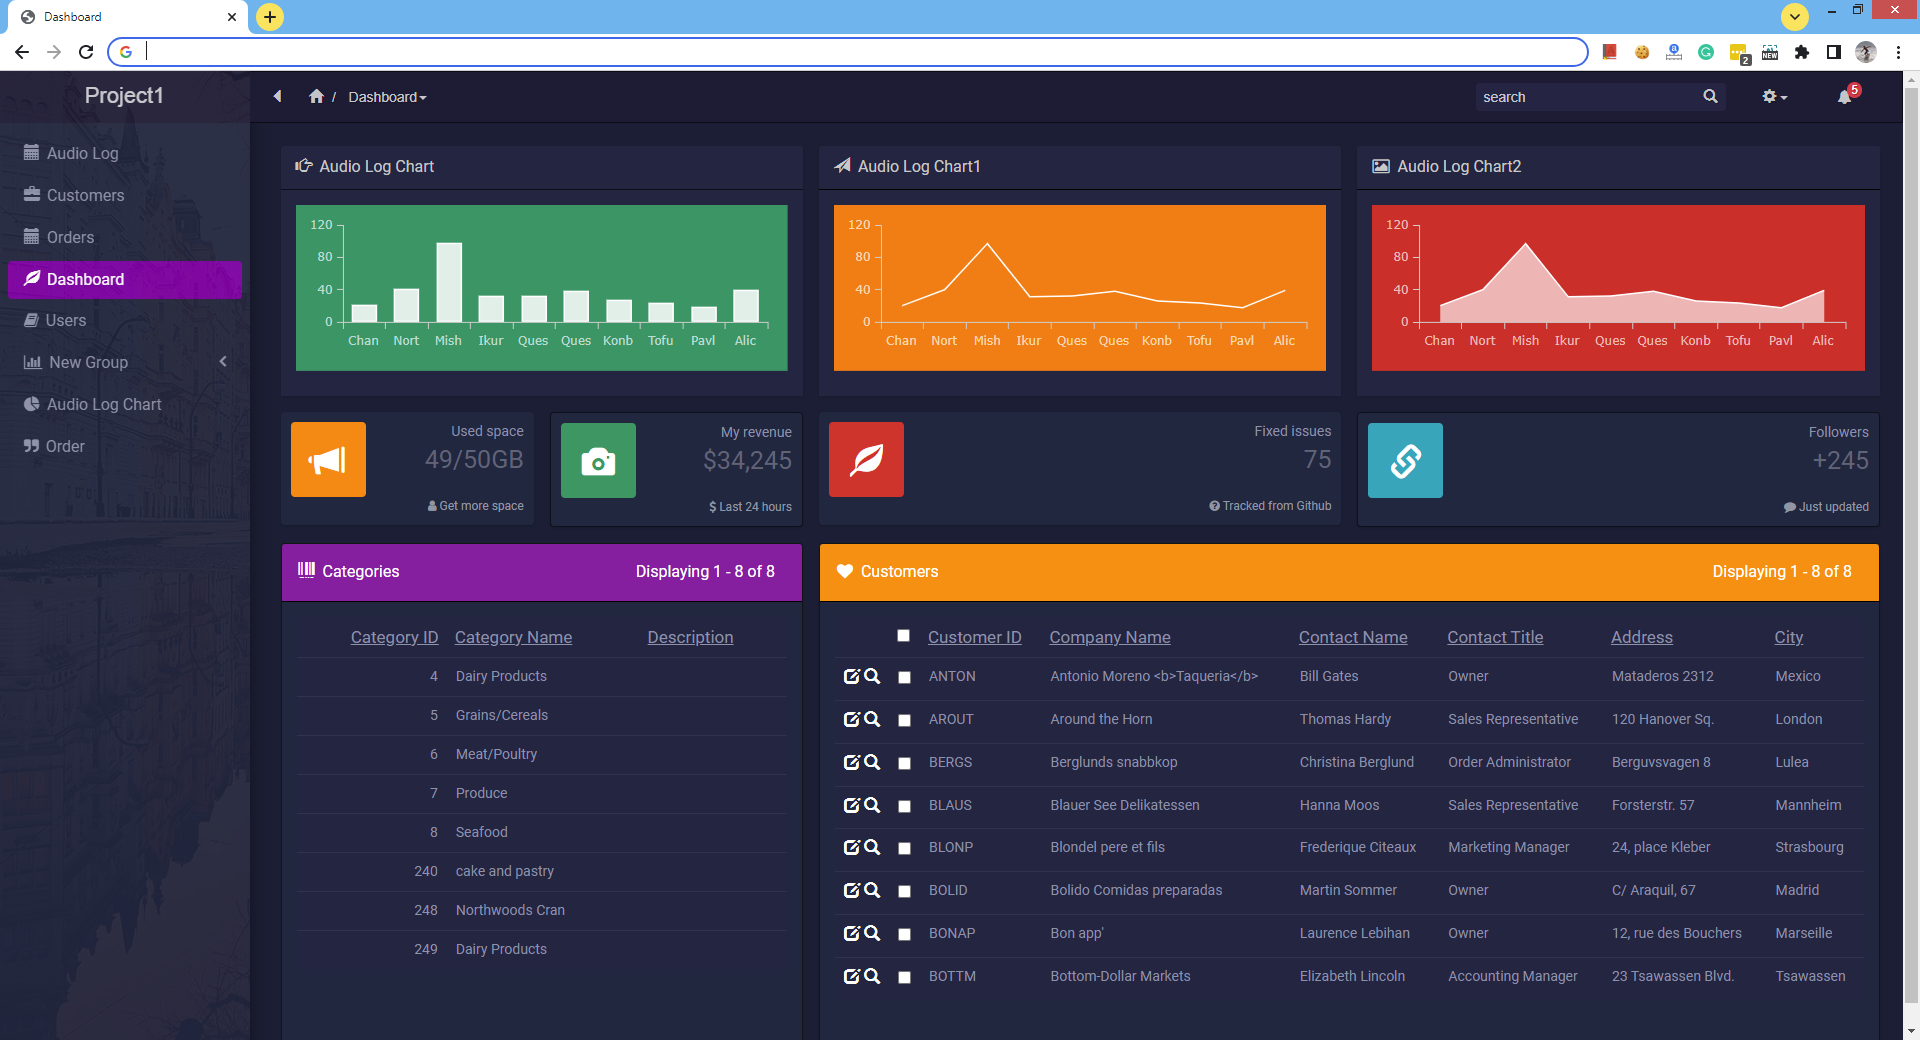
The important point is that you do not need to reproduce every detail of an external theme or replace the generated application structure. Start with PHPRunner’s built-in styling options, reproduce the major visual elements in Page Designer, and use custom CSS or ChartModify only where they provide a noticeable improvement.
Nice!! I have a question: the Sidebar Theme options; which BUILD is it in? I have 10.8 build 39712, but a cant see this options :). Thanks!!
Great. Thanks.
Awesome!
Love it
Hi,
i try this project and it’s ok, but i i copy Dashboard in Dashboard1 to make some personalization i have this error when open Dashboard1:
Fatal error: Uncaught Error: Call to undefined method eventclass_dashboard1::event_Dashboard_snippet3() in C:\progetti phprunner\DarkThemePHP108\output\include\phpfunctions.php:2613 Stack trace: #0 C:\progetti phprunner\DarkThemePHP108\output\classes\dashboardpage.php(186): callDashboardSnippet(‘Dashboard1’, Array) #1 C:\progetti phprunner\DarkThemePHP108\output\classes\dashboardpage.php(141): DashboardPage->createElementContainers() #2 C:\progetti phprunner\DarkThemePHP108\output\dashboard1_dashboard.php(31): DashboardPage->init() #3 {main} thrown in C:\progetti phprunner\DarkThemePHP108\output\include\phpfunctions.php on line 2613