The Menu Builder lets you organize your tables and views into multi-level cascading menu for quicker navigation. This feature is particularly useful if you have a large number of tables. Depending on the selected layout the menu will appear vertically or horizontally.

The menu builder is accessible from the Visual Editor tool bar. The first thing you will notice is that the menu list consists of all tables and views selected for your current project. You can modify the properties of each individual menu item by double-clicking it.
In the properties dialog you can set the item type to be either a hyperlink or a group. If the item is a link you can set the link type to either an internal application page or external page.
If Link type is set to External page, then you can add the link to any web page. If Link type is set to PHPRunner or ASPRunner page, you need to select the table within your project and then one of the core pages such as list, add, print or search.
You can also change the name of the menu item as it will be appear in your application.
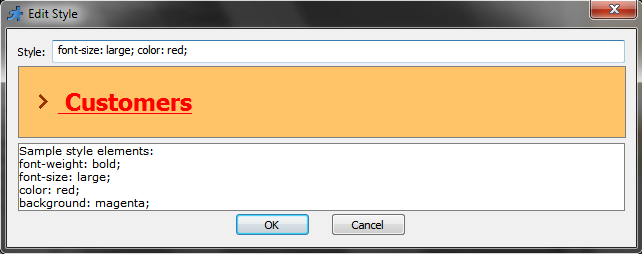
If you are in the mood for changing the look and feel of the menu item beyond the default style you can do so by using custom css. Multiple css descriptions can be added using semicolon between them.

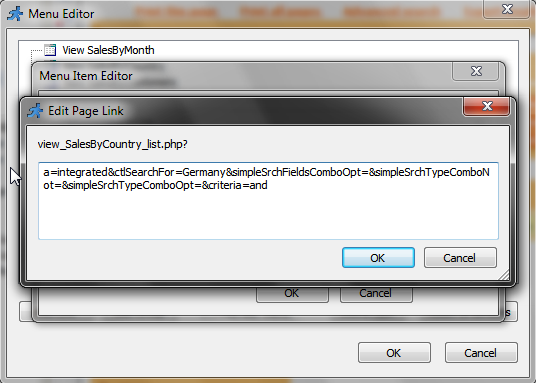
You can also set the link parameters for each menu item. For example, if I want to display the Country Sales Report order by the Sales figures you can set the parameter to orderby=dSales . If you have more complex parameters the best way to proceed would be to copy the parameter string from the application URL and paste it into the parameter dialog.

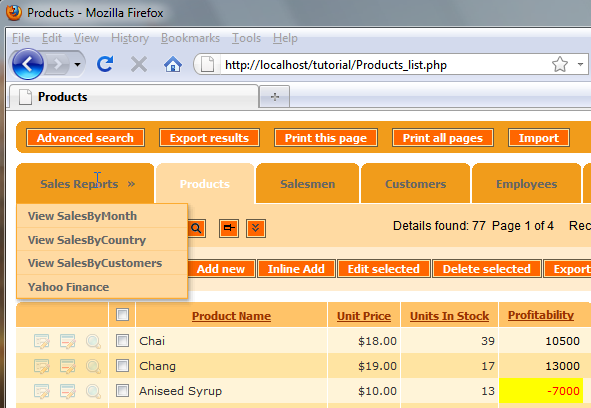
As I mentioned earlier, if you have a large number of menu items you might want to consider grouping them creating a cascading menu. For example I will group all of the sales views into the Sales Reports group. I will create a new group called “Sales Reports” and drag-n-drop the sales views under this category. Once I build my application this is how it will look like.
You will also be able to create a new links within the Menu Builder by clicking the Add Link button and setting the link properties. For example I will add an external Link within the Sales Reports group pointing to Yahoo Finance: http://finance.yahoo.com
Now let’s talk about the menu items permissions. Depending on your business application you might want to hide some of the menu items based on the application users. Perhaps we would like to hide all menu items within the Sales Reports menu if the user is not a manager. If the menu item is the link to internal application page, in our case we have three of them, you can simply assign the table permissions on the permissions step. Please refer to the Security tutorial or related help articles for more details on how to set the table permissions.
However, if the menu item is an external link like Yahoo Finance the permissions will have to be set using events. So in the ModifyMenuItem event I will enter the following code.
PHP code
if ($_SESSION["GroupID"]!="manager")
{
$title = $menuItem->getTitle();
if ($title=="Yahoo Finance")
return false;
}
return true;
ASP code
if Session("GroupID")<>"manager" then
   title = menuItem.getTitle()
   if title="Yahoo Finance" then
      ModifyMenuItem = false
      exit function
   end if
end if
ModifyMenuItem = true
The code will validate if the user is not a manager and will hide Yahoo Finance menu item. As you can see after hiding all the menu items in the Sales Reports group the entire groups is no longer displayed for the user. But if I login as the manager I will see all the menu items in the Sales Reports group.
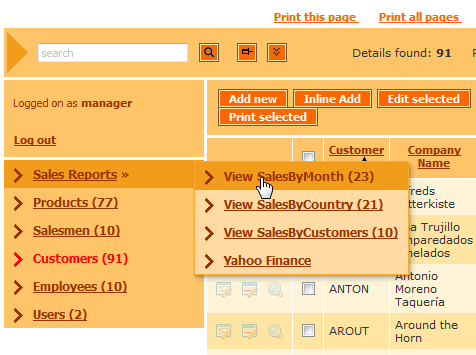
You can also use the ModifyMenuItem event to display the record counter for each menu item. To accomplish this you will need to add the following code to the event in the events editor.
PHP code
if($menuItem->getLinkType() == 'Internal')
{
   global $tables_data;
   $table=$menuItem->getTable();
   include_once(getabspath("include/".GetTableURL($table)."_settings.php"));
   $table=GetOriginalTableName($table);
   $rs=CustomQuery("select count(*) as c from " . AddTableWrappers($table));
   $data = db_fetch_array($rs);
   $menuItem->setTitle($menuItem->getTitle() . " (". $data["c"] . ")");
}
return true;
ASP code
if menuItem.getLinkType() = "Internal" then
   table=menuItem.getTable()
   asp_include "include/" & GetTableURL(table) & "_settings.asp", true
   table=GetOriginalTableName(table)
   set rs=CustomQuery("select count(*) as c from " & AddTableWrappers(table))
   menuItem.setTitle_p1(menuItem.getTitle() & " (" & rs("c") & ")")
end if

ModifyMenuItem = true
The code will validate if the menu item is an internal table or view and will concatenate the number of records with the menu item name.

Very good and works fine…what´s missing is an event ‘Before opening an external file’…
Robert
Robert,
it’s kind of impossible. Think of opening a regular HTML link in browser. It happens without any interaction with the server side which means you cannot associate any events with it.
If external page is something that you can control – add your code there.
This works fine.
If I login as a specific user, set in Advanced Permissions to “users can see and edit their own records only” it still displays TOTAL no of records in brackets Eg (2354) iso only the records relevant to the logged on user. Eg(1)
How whould onechange this.
The Menu Builder is perfect, provided all of your tables are within the same database. However, this is more a downfall of PHPRunner as a whole.
Is there currently any means of adding tables from multiple databases to a single layout? This would cure my headache of having my partners and I need to log in each time we need to view a table within a different directory (since it is a differing DB).
I hope that makes sense.
used this on my site , beneficial , but getting issue in adding the image on loin page