PHPRunner’s Security API lets an administrator switch to another application user without knowing that user’s password. This is useful when an administrator needs to reproduce a problem using the same pages, permissions, and data access as the user.
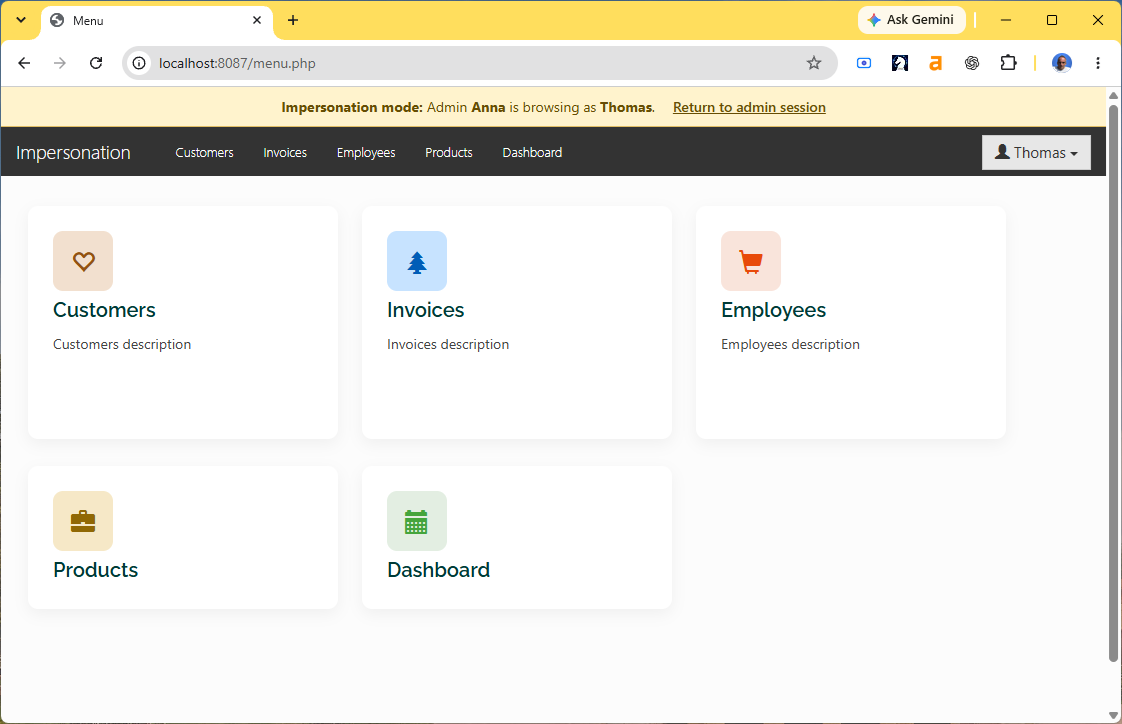
In this tutorial we will add an impersonation button to the login table, switch accounts with Security::loginAs(), display a warning banner while impersonation is active, and provide a link that restores the original administrator session.
We will cover:
1. Preparing the login table and administrator group
2. Adding an impersonation button to the List page
3. Showing the button only to administrators
4. Switching to the selected user
5. Redirecting after impersonation
6. Adding an impersonation banner
7. Styling the banner
8. Returning to the administrator session
1. Preparing the login table and administrator group
This tutorial assumes that database authentication and user group permissions are already configured in PHPRunner. The table used for authentication must also be included in the project and have a List page that administrators can open.
The sample project uses first_name as the username field. Replace first_name in the code below if your login table uses another field.
We will also use Administrators as the administrator group name. Replace it with the group name used in your project.
2. Adding the impersonation button to the List page
Open the login table’s List page in Page Designer and switch to Advanced Grid. Select a grid cell, then use Insert → Custom button → New button.
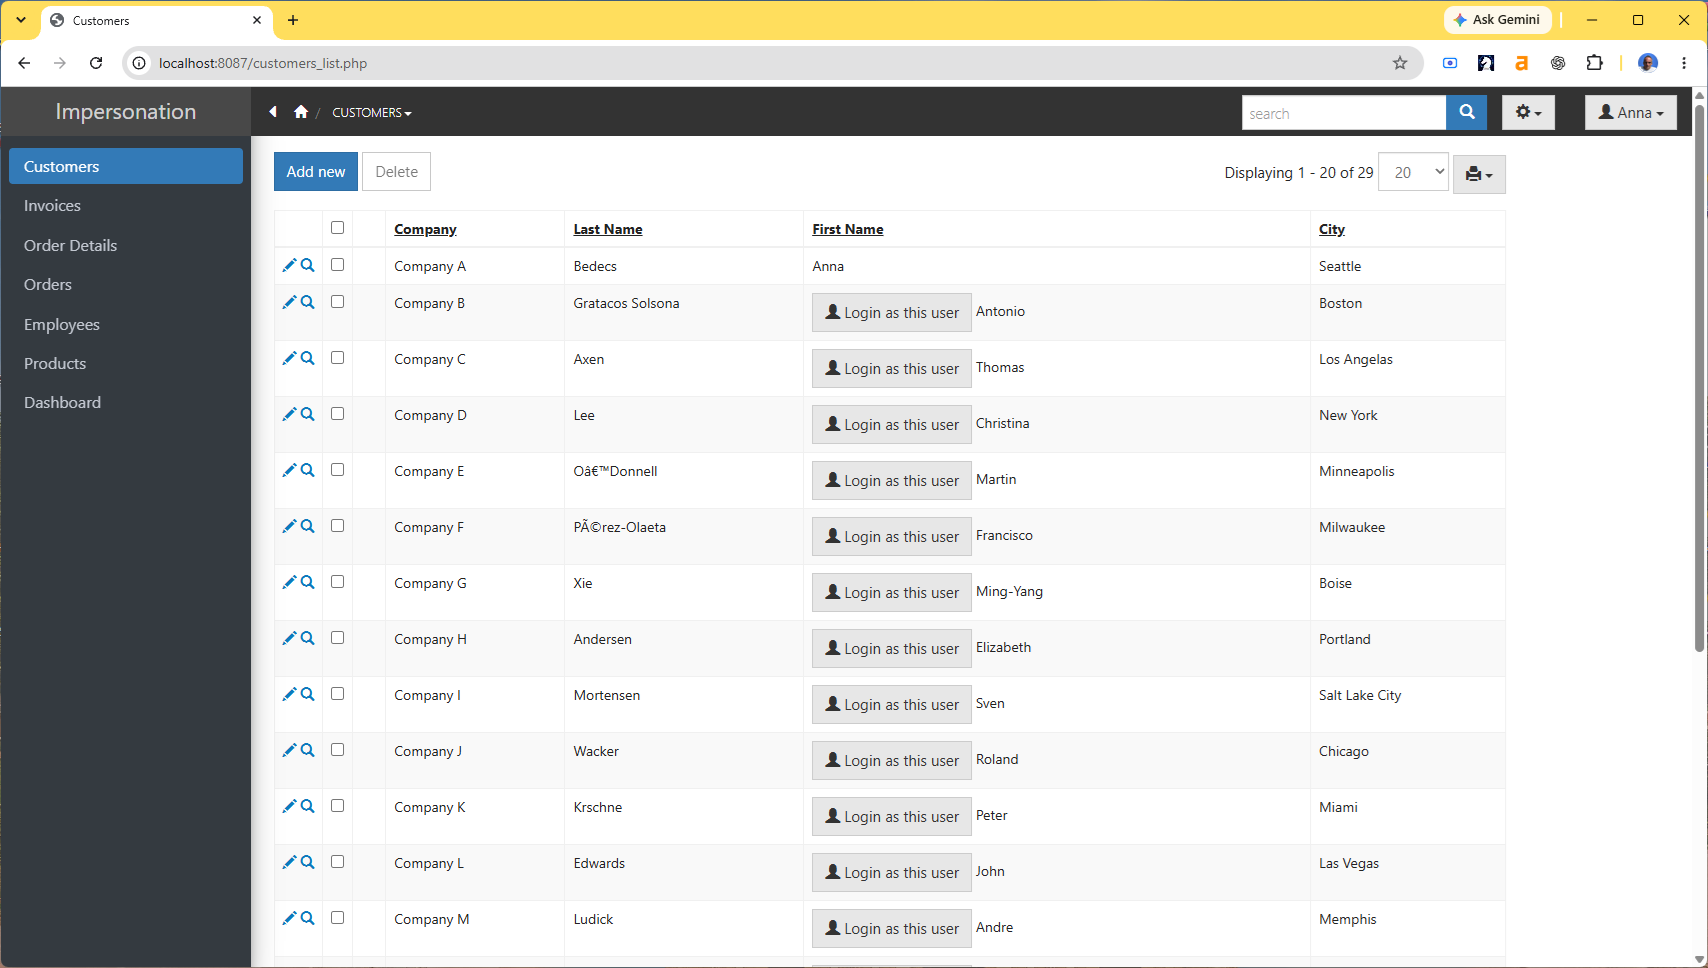
Set the button label to ‘Login as this user’ and place it inside the grid row. Select the button and set its Item ID to:
‘login_as_user’
The Item ID is important. It is the value used by hideItem() in the next step. You can select the button in Page Designer and find its Item ID in the properties panel on the right.
3. Showing the button only to administrators
Open Events → login table → List page → After record processed and add the following PHP code:
The second argument of hideItem() is required because the button is located inside a List page grid row. The code hides the button from non-administrators and also hides it on the administrator’s own record.
4. Switching to the selected user
Open the custom button code and select its Server tab. Add the following PHP code:
The group is checked again on the server so that hiding the button is not the only protection. The original administrator username is saved before Security::loginAs() replaces the current login session.
5. Redirecting after impersonation
In the same custom button, open the Client After tab and add this JavaScript code:
The redirect reloads the application menu using the impersonated user’s permissions.
6. Adding the impersonation banner
Proceed to Style Editor → Templates → header.htm. Add the following code to the common project header:
The banner appears on every generated page while an administrator is impersonating another logged-in user. The usernames are escaped before they are inserted into the page.
7. Styling the banner
Open Style Editor → Modify CSS and add the following project-level Custom CSS:
Besides styling the warning, this CSS moves PHPRunner’s fixed navigation elements below the banner.
8. Returning to the administrator session
Open Events → Global events → After App Init and add the following PHP code:
The event defines the administrator group used by the other events. When the return link is clicked, it restores the saved administrator username, removes the impersonation marker, and redirects back to the menu.
After rebuilding the project, log in as an administrator and open the login table’s List page. Click ‘Login as this user’ beside another account. PHPRunner will apply that user’s identity and permissions, display the impersonation banner, and allow you to return to the original administrator session.
