Quick jump |
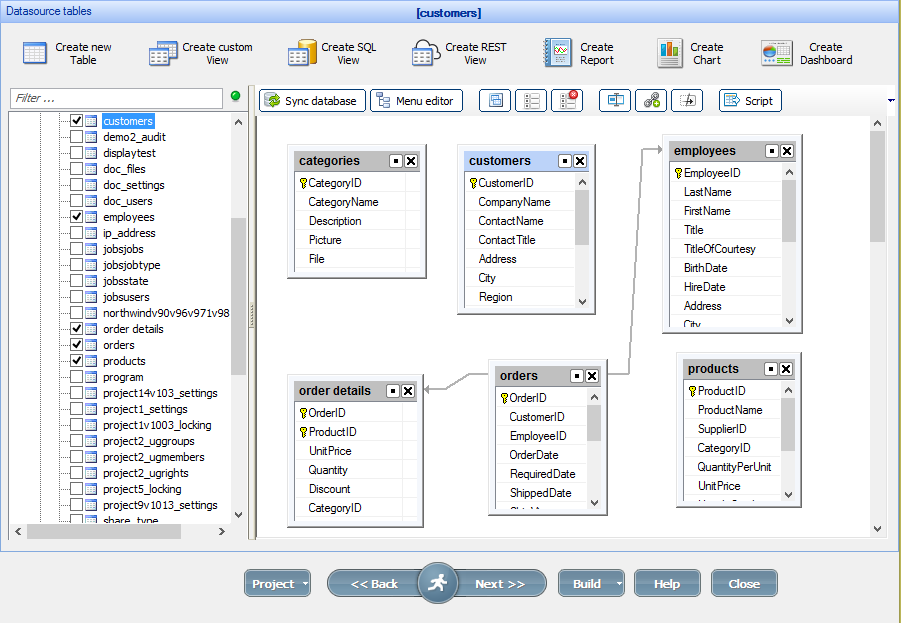
After you successfully connected to the database, select all datasource tables you'd like to build PHP code for. Next, highlight one of the selected tables and proceed through the other screens in PHPRunner adjusting settings for the selected table.
You can always see the name of the currently selected table in the middle of the blue info pane on top. To switch between selected tables, use the Table list pane on the left.
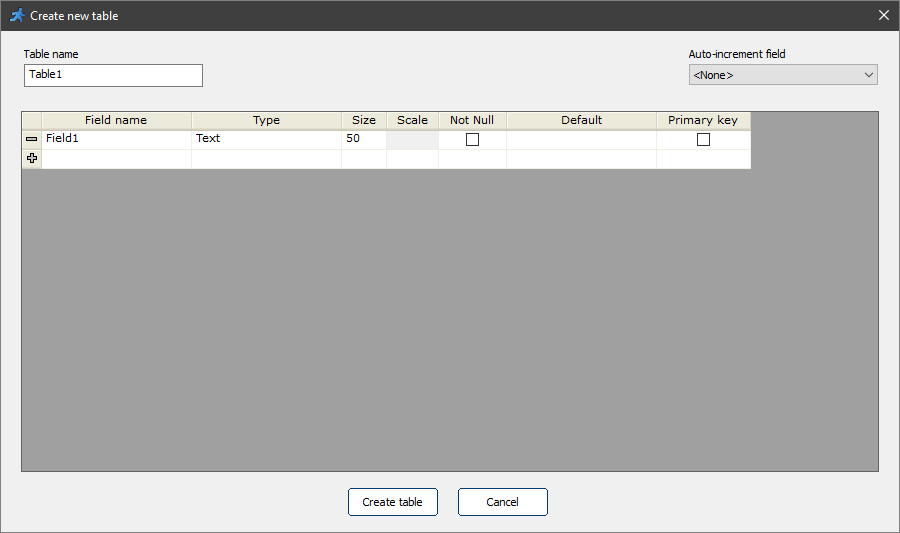
Type in the name, type, size, scale (applies to the DECIMAL field type in SQL Server, Oracle and MySQL only) for each field. Set the Primary key field. Click Create table.
Note: you can also add a new custom view, report, chart, or dashboard to your project.
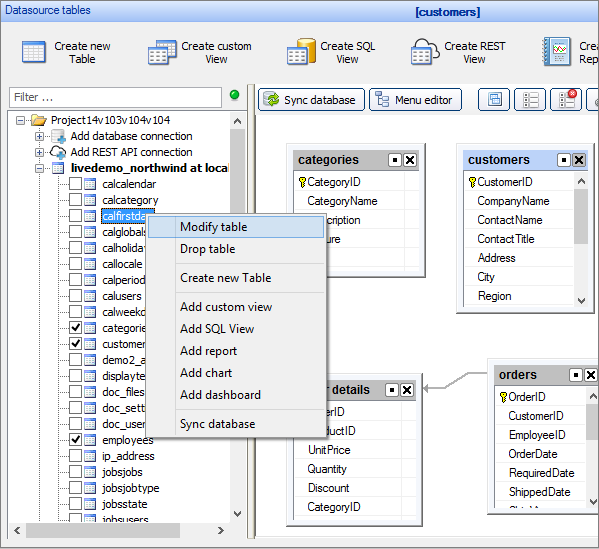
To edit or delete the tables, right-click the table name in the list.
Toolbar
Button |
Description |
|
Synchronizes the database. |
|
Opens Menu Builder. |
|
Arranges tables alphabetically. |
|
Shows all fields in all tables. |
|
Hides all fields in all tables. |
|
Opens the New relationship dialog where you can add new table relations. |
|
Opens the Create SQL script window where you can create SQL scripts for tables/data transfer to another server. |


Table context menu
To open the context menu of a table/view/chart/report/dashboard, click  near its name or right-click the table.
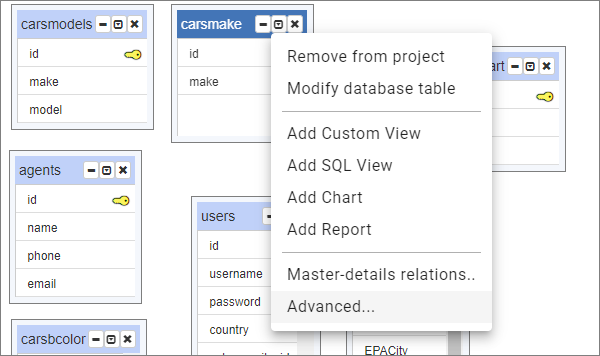
Click the Advanced settings to change the base table for view/chart/report or filename prefix.
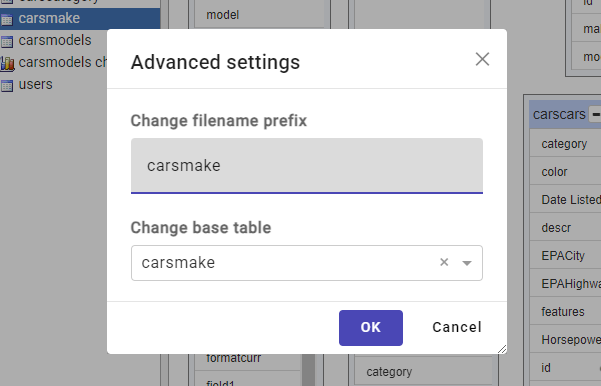
Since the view, chart, and report may include fields from several tables, the base table is the table where the data is added, edited, and deleted. Key columns can be selected for the base table on the Choose pages screen.
By default, the prefix for each generated file name is the table name. E.g., if the table name is OrderDetails, the file name of the List page becomes OrderDetails_list.php. If you change the prefix to details, the file name becomes details_list.php.
Export/Import tables between projects
Export
Select one or more tables, right click and choose 'Export N tables'. You can use Ctrl or Shift key to select multiple tables.
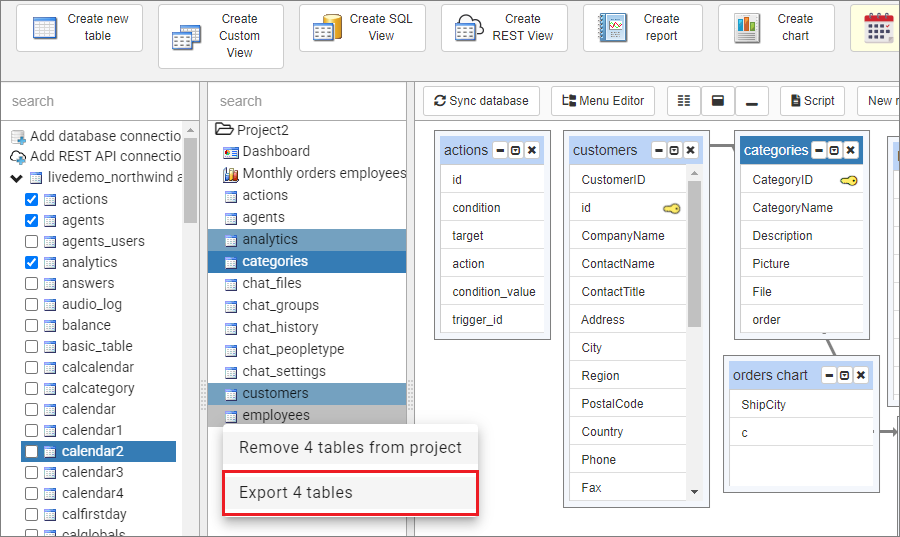
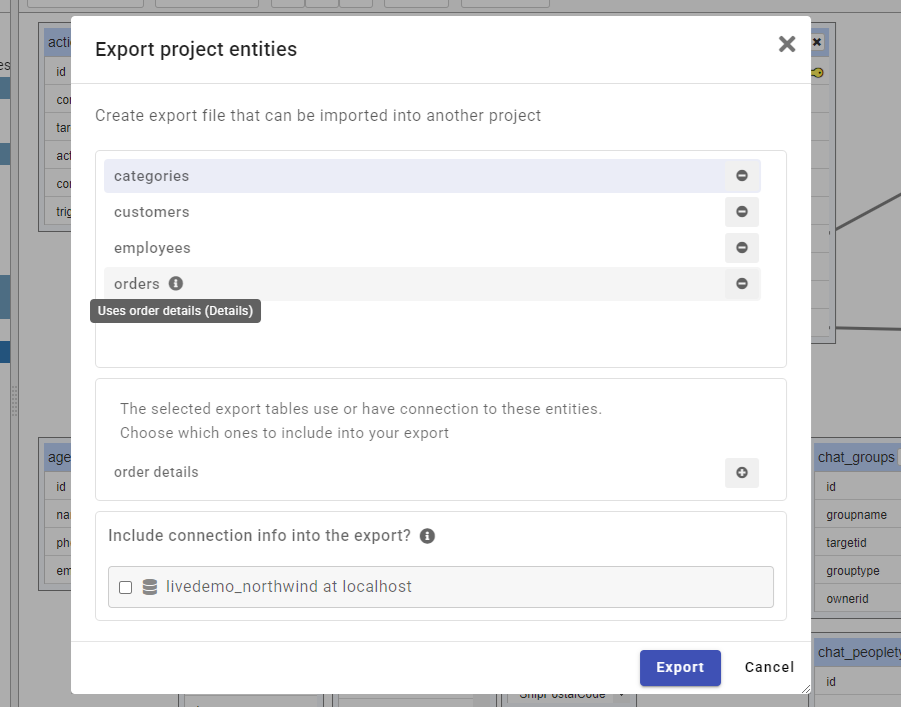
Once export option is chosen you will see an export dialog. The top part of the dialog shows selected tables. The part in the middle shows related tabled that were not selected but might be useful to include into export. Related tables can be a part of master-details relationships, lookup tables, dashboard elements, charts added via 'Insert Chart' function.
You can also export database and REST connections used in exported tables. Those connections will be created in the project you are importing it into.
Once export process is finished, PHPRunner will point you to the location of the export zip file.
Import
You can open the second project now. Click Project button in the left bottom corner and select 'Import tables ...'. Point it to the zip file created during the export process. You will see a dialog that shows the list of the tables to be imported and a list of potential import problems.
If the table doesn't exist in the target database, you will be offered an option to create it.
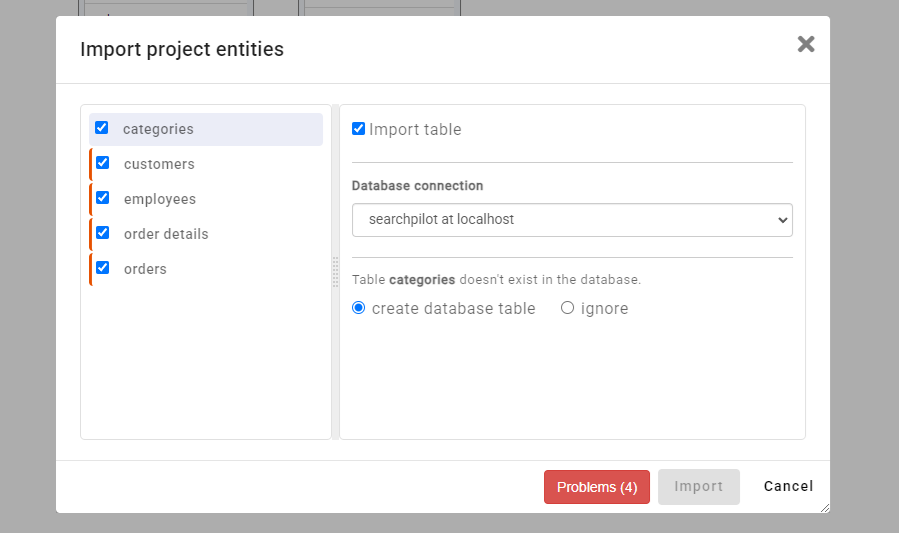
If the table already exists in the target project and database you will be offered an option to either replace the existing table or to rename it and import under a different name.
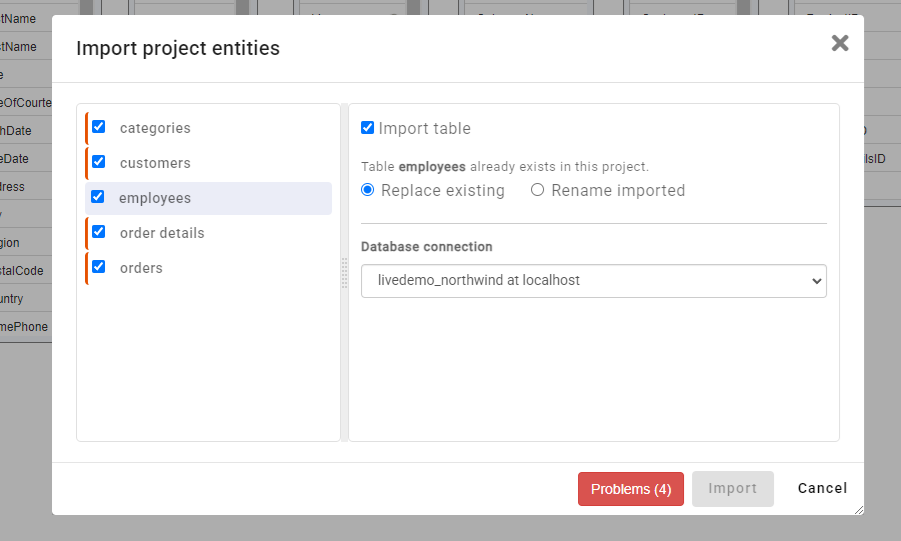
The 'Import' button becomes enabled once all conflicts are resolved and you can proceed with the import.
Click Create custom View to create an additional view of the same table. This feature is useful if you want to present several views of the same data.
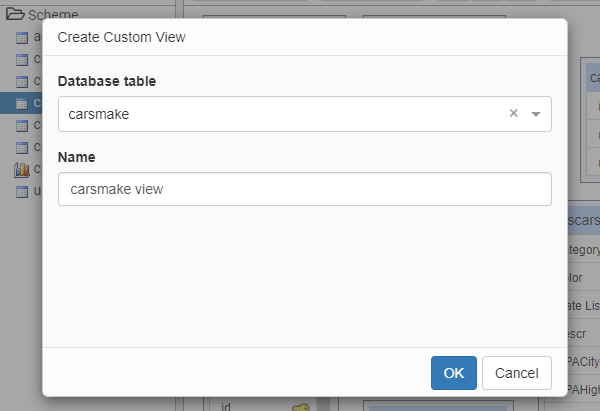
When you create a new custom view, all current settings of the table are copied into it, except for visual templates and events. You can create a copy of an existing custom view: right-click the custom view and select Copy.
Note: custom views are not created in the database and only exist in the project.
Example:
The Cars table shows all cars in the database. SQL query: select * from Cars.
The Active listings view displays only the active listings. SQL Query: select * from Cars where status='active'.
The Closed listings view displays only the closed listings. SQL Query: select * from Cars where status='closed'.
The SQL query can be modified later on the SQL query screen in PHPRunner.
Note: when you create a custom view, all source table settings are copied to the Custom view settings.
Every time you make changes on the Datasource tables screen (e.g., create a new table, add or edit table fields, etc.), make sure that these changes are synchronized with the database. The structures of the database and PHPRunner project should be synchronized.
To synchronize the database manually, use the Sync database button or right-click the table tree or blank area near the table tree and select Sync database.
You can add multiple data sources and mix several database types like MS Access, SQL Server, and MySQL in a single PHPRunner project. You can have a master table in MySQL and a details table in MS Access. The same applies to lookup tables.
Note: the Multiple database connections feature is available only in the Enterprise Edition of PHPRunner. See Editions Comparison to learn more.
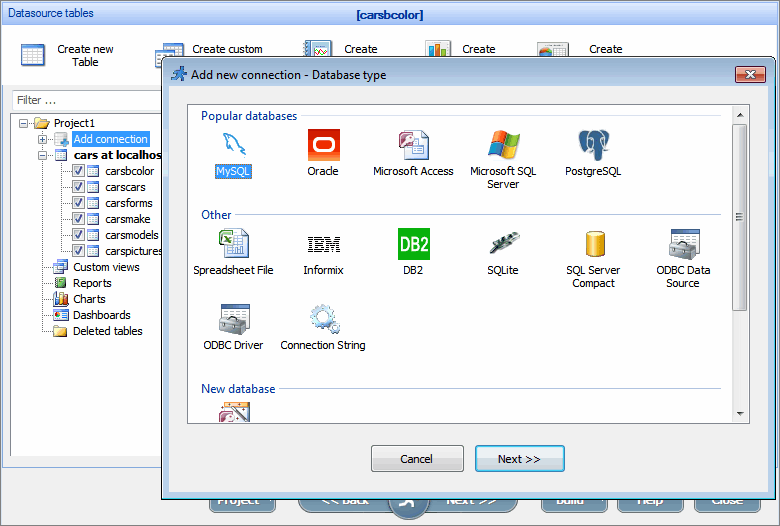
To add a new database connection:
•click Add connection;
•select the database type and connect to the database.
The first database connection is considered "primary". However you can make any other connection primary by right-clicking the database name and selecting the corresponding option.
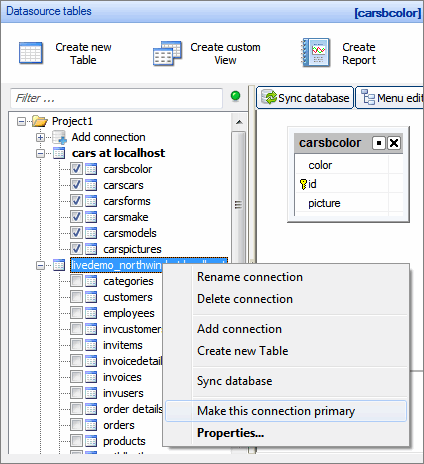
The following features work only with the primary database connection:
•Add template to project - the template can be only added only to the primary database.
•Upload to demo account - the tables from the primary database are uploaded to the demo account.
We do not recommend to add tables with the same names that belong to different database connections in order to avoid conflicts.
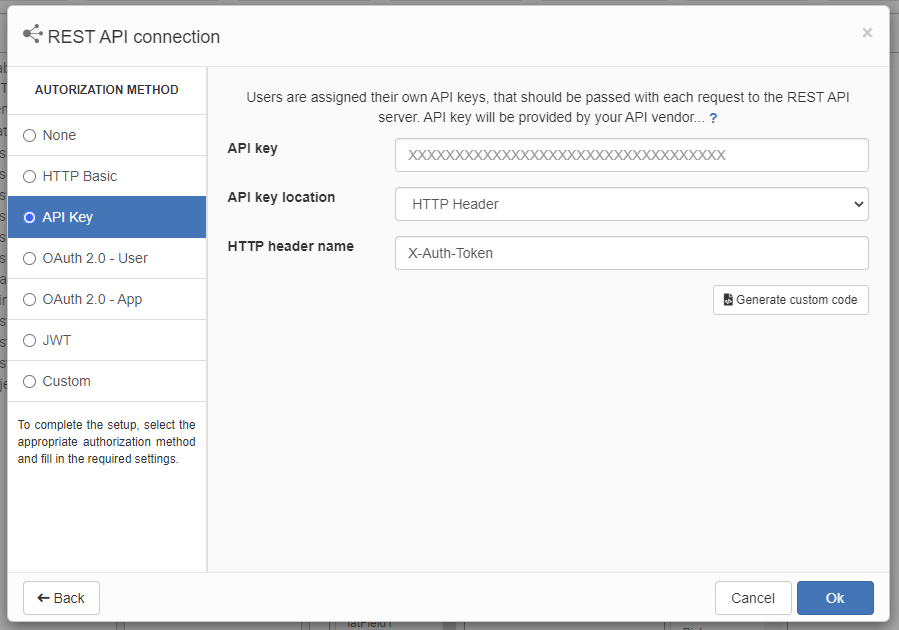
REST API Connections
PHPRunner is able to display data received from the third party REST APIs. In order to create such a REST View you need to add a REST API connection.
See also: