Quick jump |
By default, the generated app doesn't have the user registration page. It uses either the hardcoded login/password or an already existing table with the login/password in the database. You can change that with the Registration and passwords option.
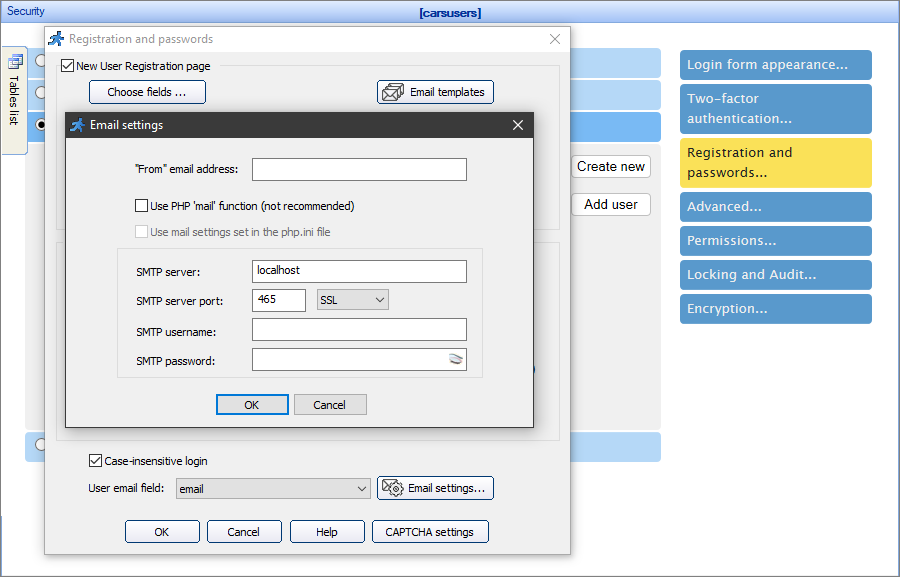
Press the Registration and passwords button on the Security screen to open a popup with the registration and passwords settings.
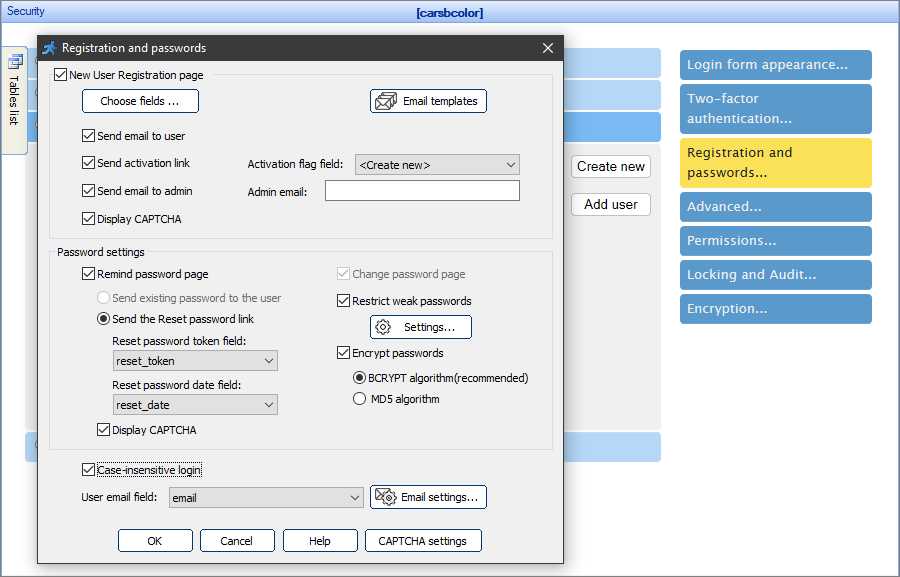
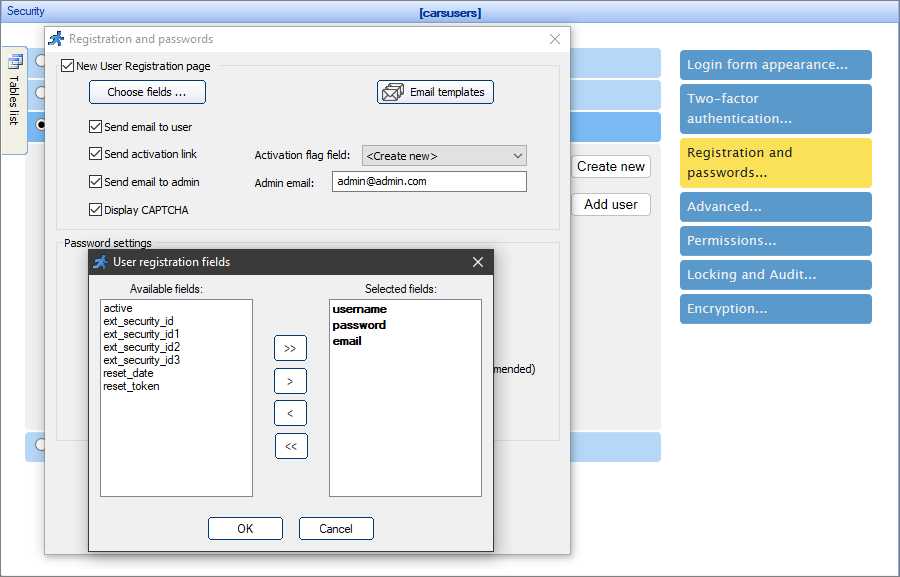
To create a new user registration page, select the corresponding checkbox, and click Choose fields to select the fields that appear on the registration page.
Select the Send email to user checkbox to send an email to the users upon their registration. You can edit the user email template with the Email templates dialog.
Note: do not forget to choose the User email field at the bottom of the popup.
With the Send email to user checkbox selected, you can also select the Send activation link checkbox to include the activation link into the registration email. The purpose of the activation link is to ensure that the user signs up with a real, active email address that they own. This helps in reducing the number of users with inactive or fake emails. The access is denied until the user opens the activation link in the browser.
Note: the activation link option requires having an activation flag field in the table. Select one of the existing fields or create a new one to store the activation flag. This field needs to be numeric (Number, INT or TINYINT).
You have the option to send an email to the admin when a new user registers on the site. Select the Send email to admin checkbox and fill the admin email field to do so. You can edit the admin email template with the Email templates dialog.
Select the Display CAPTCHA checkbox to display CAPTCHA on the Registration page. For more information, see CAPTCHA on authentication pages.
You can customize the templates for the emails that are sent to the user/admin upon the new user registration with the Email templates dialog.
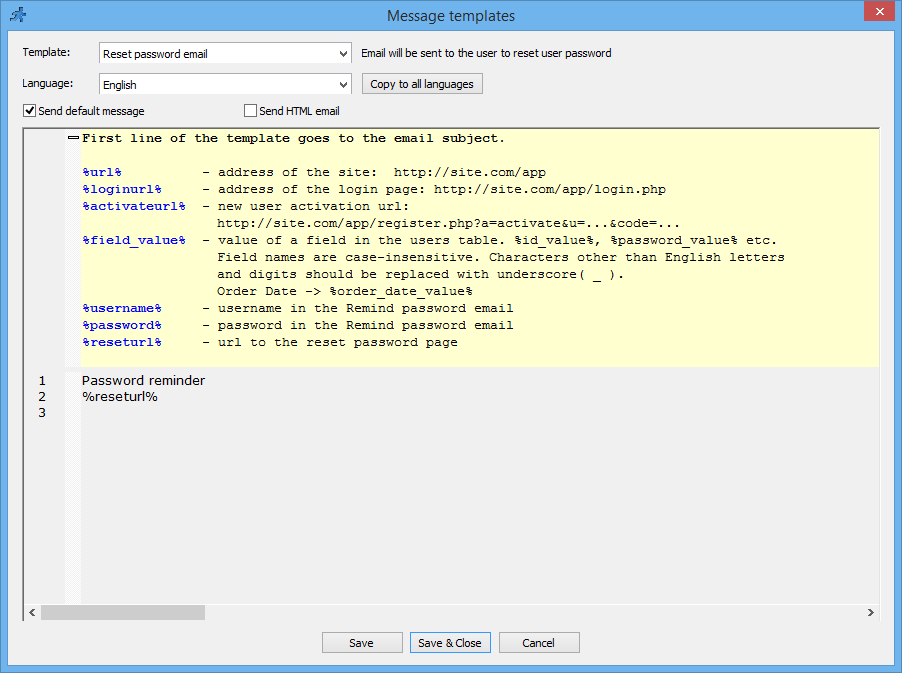
Select the template at the top of the window to view it. Deselect the Send default message checkbox to edit the template.
Note: you can use the text variables in the templates. The list of variables is available within the Message templates collapsible description.
You can turn on the Change password and Remind password pages with the respective checkboxes.
You have the option to Restrict weak passwords. Click Settings to set the minimum password length, the number of unique characters, digits and symbols, or to accept passwords with both upper and lower case letters only.
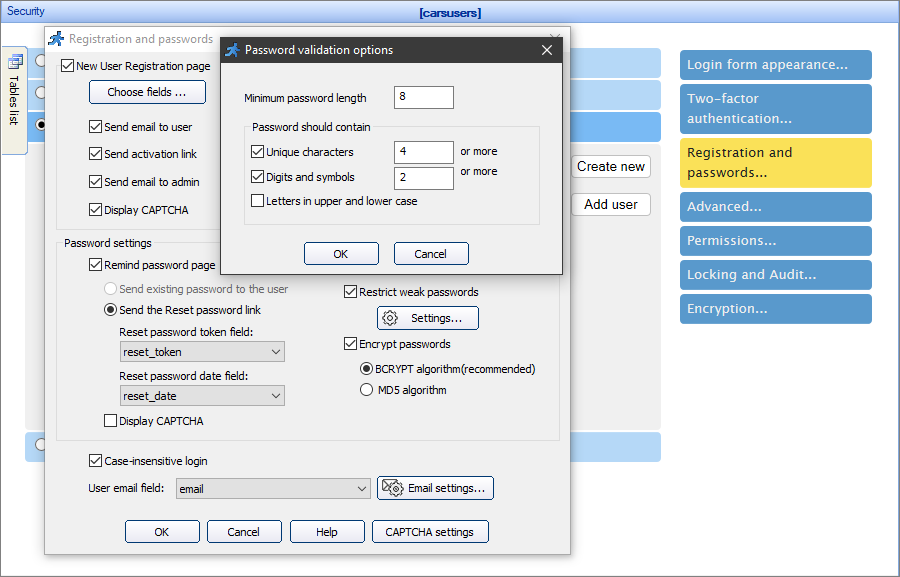
Select the Encrypt passwords checkbox to encrypt the passwords in the database. Choose between the BCRYPT algorithm (the industry standard), or the MD5 algorithm.
Note: BCRYPT hash can be up to 60 characters long. Make sure that your password field in the database can fit it.
You can also hash your passwords manually using Events.
For instance, you want to provide the admin with direct access to the login table. Add the following code to the BeforeAdd/BeforeEdit events of the login table:
For BCRYPT:
values.InitAndSetArrayItem(MVCFunctions.getPasswordHash((XVar)(values["password"])), "password");
For MD5:
values.InitAndSetArrayItem(MVCFunctions.md5((XVar)(values["password"])), "password");
The Remind password page has the option to send the existing password to the user or to send the Reset password link. With the Send the Reset password link, you need to choose or create a new Reset password token and Reset password date fields.
Note: the Send existing password to the user option is unavailable when you have the Encrypt passwords option enabled.
Select the Display CAPTCHA checkbox to display CAPTCHA on the Remind password page. For more information, see CAPTCHA on authentication pages.
Encrypting existing passwords in the database
Sometimes you start with storing plain text passwords in the database and decide to switch to encrypted passwords later on. Once you do this, existing users won't be able to logon and will need to reset their passwords. To ensure a smooth transition, you may want to email your existing users, asking to reset their passwords.
Select the Case-insensitive login checkbox to make the site, for instance, consider 'USER' and 'user' the same logins.
With Email settings, you can enter the email from which to send emails to the users, and define the settings of the custom mail server, if you do not use the built-in mail server. See Miscellaneous settings to learn more.
Security screen articles:
•CAPTCHA on authentication pages
See also: