Active Directory authentication allows users to log in to the generated by ASPRunner.NET applications if they have an account in an Active Directory domain. When logging in, the login and password are checked against Active Directory.
Note: the Active Directory authentication feature is available only in the Enterprise Edition of ASPRunner.NET. See Editions Comparison to learn more.
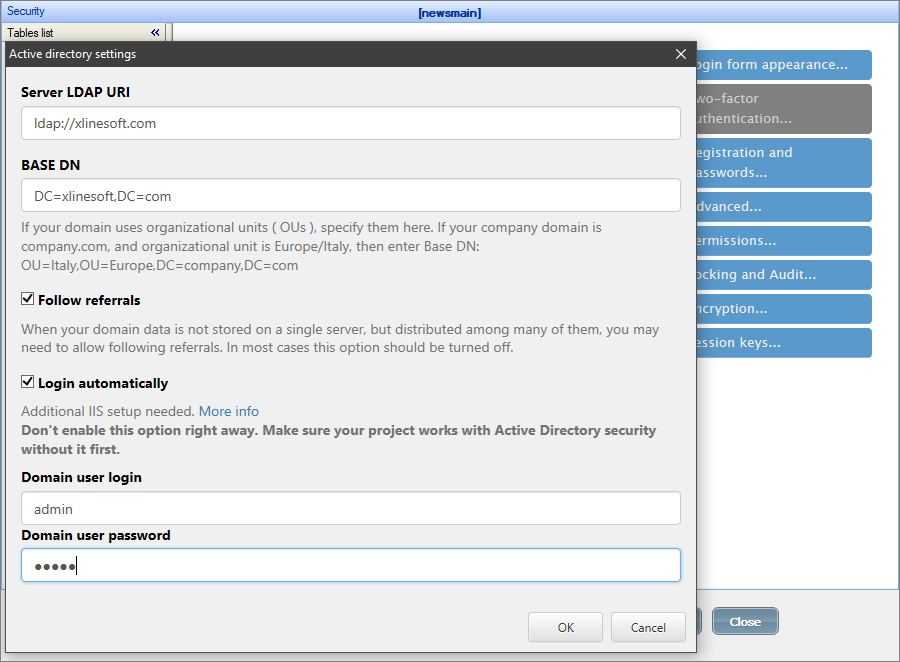
To use this type of authentication, you need to fill the Active Directory Domain and Server. In the most straightforward use case, no additional configuration is needed.
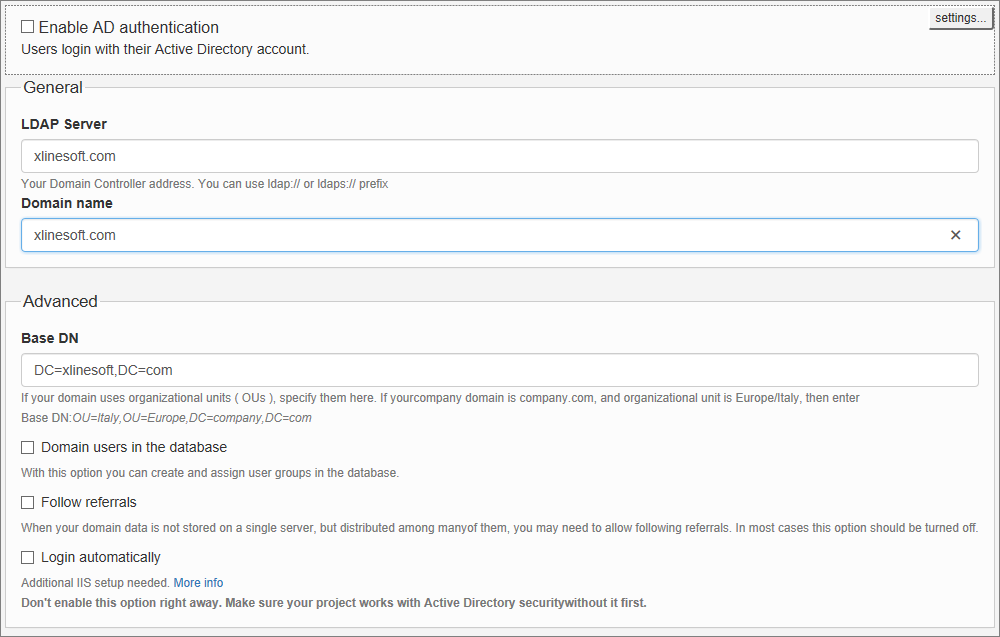
LDAP Server
Here you can specify Active Directory or LDAP server address.
Sample LDAPS URIs: ldaps://server:636/ or ldaps://server
Base DN
Here you can specify Organizational Units (OU) in the wizard software. If your domain uses organizational units (OUs), specify them in this field. If your company domain is company.com, and the organizational unit is Europe/Italy, then enter the Base DN as following: OU=Italy,OU=Europe,DC=company,DC=com.
Domain users in the database
After user logs in to your application for the first time their info will be saved in the database. You can define user groups in your application and assign users to these groups. This way you will not be using AD/LDAP groups at all.
Read groups from the domain
This option makes the most sense when you use Dynamic User Group Permissions. The list of groups will be ready from AD/LDAP server and you will be able to assign permissions to those groups in your application.
Follow referrals
When your domain data is not stored on a single server, but distributed among many of them, you may need to allow following referrals. In most cases, this option should be turned off.
Login automatically
This checkbox enables the Autologin functionality: if a person is already logged into Windows, they are automatically logged into the generated application. To use this feature, make sure Windows Authentication is enabled in Internet Information Services (IIS). More info below.
How to enable Windows Authentication
1.Make sure you have IIS installed. Go to Control panel -> Programs -> Turn Windows features on or off and select the Internet Information Services. After that, select the Windows Authentication under IIS -> World Wide Web Services -> Security. Click OK and wait for everything to install.
2.Run IIS manager as the administrator: Go to Control Panel -> Administrative Tools -> Internet Information Services (IIS) Manager.
3.Expand the server in the Connections frame and choose the site, or click on the server if you wish to apply settings for all sites.
4.Double-click the Authentication icon in the main window.
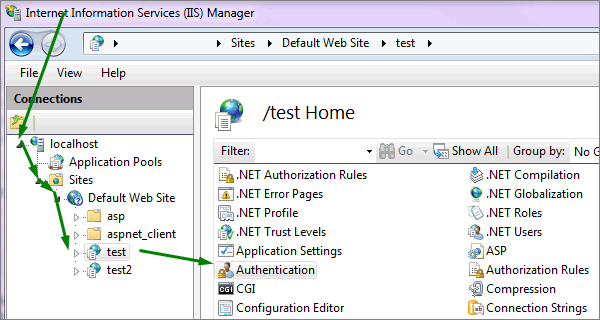
5.Right-click Windows Authentication and choose Enable.
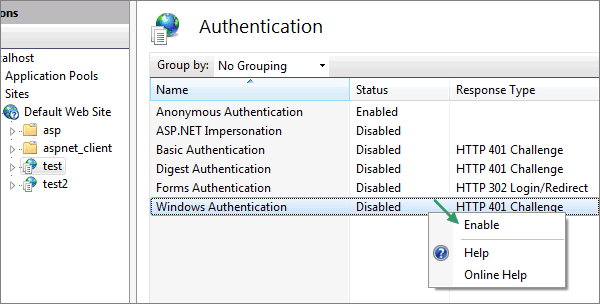
6. Also, Anonymous Authentication needs to be disabled.
Active Directory authentication and Permissions
You can use the Permissions feature along with the Active Directory authentication. Click on Permissions and enable the Use Dynamic Permissions checkbox. You need to choose tables to store the permissions and create an admin user.
To add an admin user, click Add admin user and then Search. You need to fill the username and password to connect to Active Directory. Then you can to select a group or groups to have the admin access.
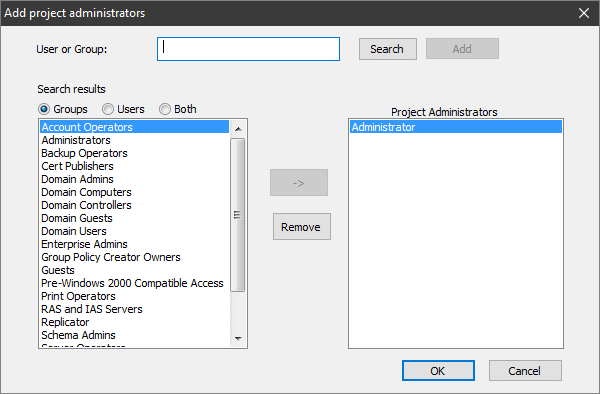
If your project utilizes Dynamic permissions and you have enabled the Login automatically checkbox, you also need to specify the Domain user login and password.
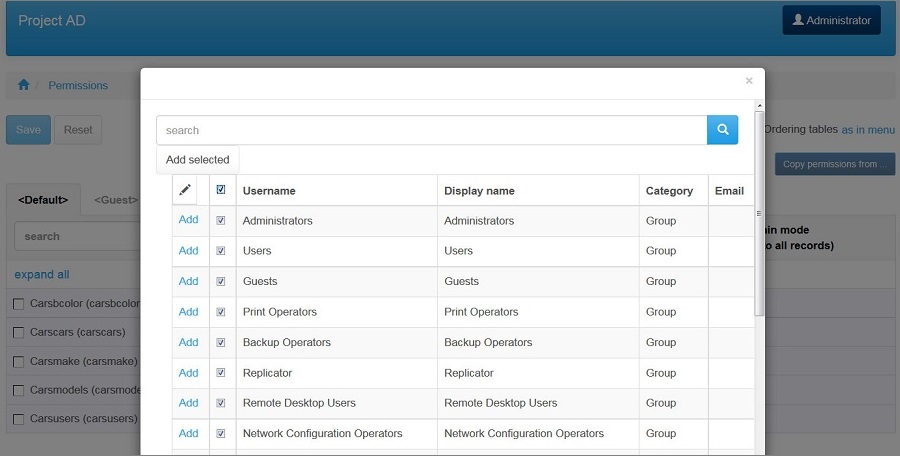
Build your project and login as admin to the generated application. In the Admin Area on the Admin Rights page, you can add groups via Add Group and assign permissions to them.
Note: you can not create groups manually since they are stored on the Active Directory server and should be modified there.
Security screen articles:
•CAPTCHA on authentication pages
See also: