Standard mail servers are Gmail, Outlook, Office365, iCloud and Yahoo. The software already knows SMTP parameters for these email providers so you only need to enter settings like email and password.
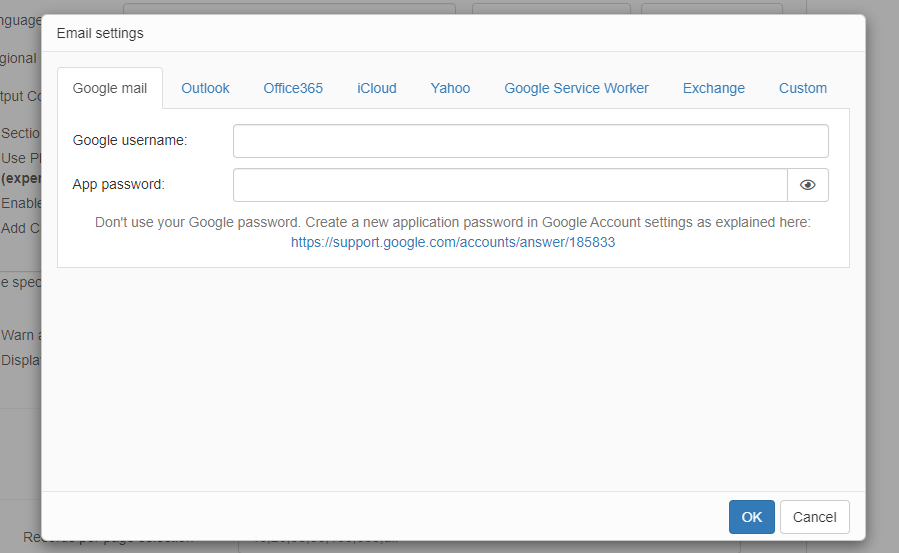
A few Gmail-specific notes:
•Logon to your Gmail account at least once before using Gmail's SMTP settings in your project
•Turn off two-factor authentication
•Allow "Less secure apps" in Gmail account settings
This is where you can enter SMTP settings of your own mail server or the one provided to you by your web hosting provider.
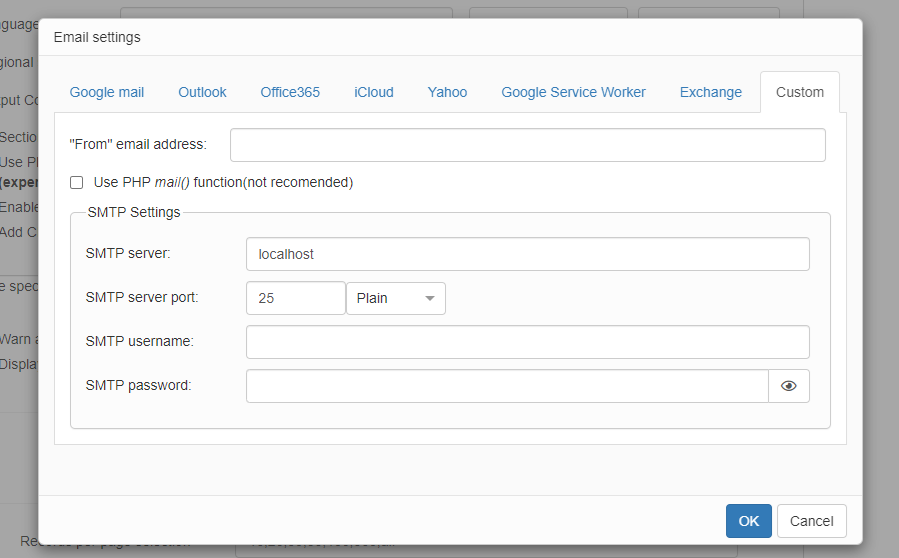
Note: SMTP server, SMTP server port, as well as Secure connection (SSL) settings, may differ from the ones stated in the example. Contact your Mail Service Provider to get the necessary information.
Use this option if your application is hosted on Google Cloud Platform.
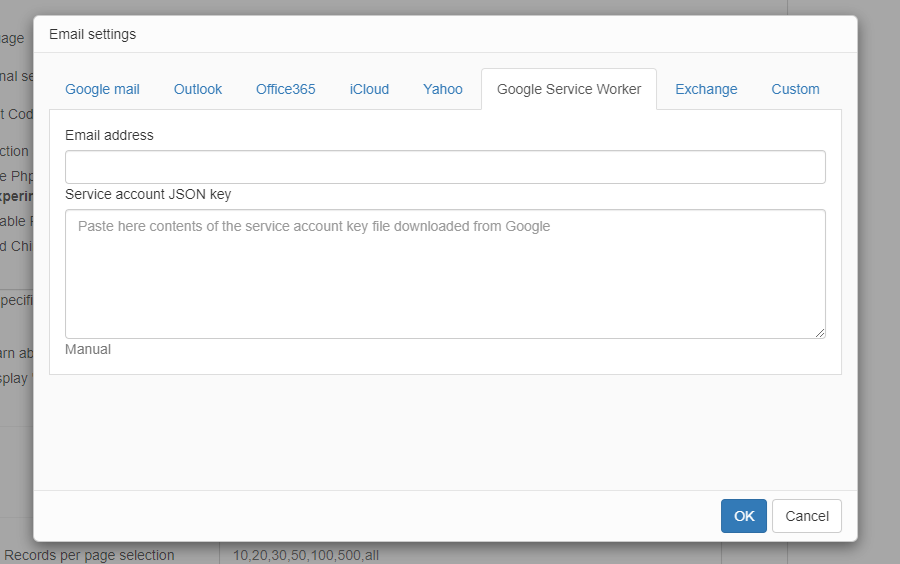
Email address is service account email address, the one that emails will be sent from. JSON key will be create on the step #5 of instructions below.
1. In order to allow project creation we need to enable Project Creation in Google Cloud Platform.
•Sign in to the Google Admin console with a Super Administrator account.
•Navigate to Apps > Additional Google Services.
•Locate the Google Cloud Platform service and ensure it is ON for the relevant organizational units or for everyone.
•Within the Google Cloud Platform settings, ensure the "Allow users to create projects" box is checked.
2. Granting Project Creator Permissions
•Sign in to the Google Cloud Console with an account that has appropriate permissions (e.g., Organization Administrator).
•Navigate to IAM & Admin > IAM.
•Click Grant Access.
•In the Principals field, enter the email address(es) of the user(s) or Google Group(s) you want to grant project creation permissions to.
•In the Select a role field, search for and select the "Project Creator" role (roles/resourcemanager.projectCreator).
•Click Save.
3. Create a project
•Proceed to Google Cloud Console
•Click "Select a project" → "New Project"
•Enter project name. Select an organization or keep "No organization"
•Click "Create"
4. Enable required APIs
•In the menu on the left choose "APIs & Services" → "Library"
•Find and enable Gmail API
5. Configuring service account.
•IAM & Admin → Service account
•Create service account
•Enter the name of Service account -> Create and continue -> Done -> Done
•Proceed to the service account you just created Keys tab -> Add key -> JSON -> Create
•JSON file will be created and downloaded. You need to open it in any text editor and paste into Service account JSON key field.
6. Domain-Wide Delegation setup
Step 1: Turn on delegation
•Proceed to Service Account → Edit
•Turn on Enable G Suite Domain-wide Delegation
•Save Client ID as it will be required later
Step 2: Google Admin Console
•Proceed to Google Admin Console
•Security → API controls
•Under Domain wide delegation click Manage Domain Wide Delegation
•Add new → and enter Client ID of your Service Account
•Add required scopes:
# Required scopes
https://www.googleapis.com/auth/gmail.send
https://www.googleapis.com/auth/gmail.compose
https://www.googleapis.com/auth/gmail.modify
https://mail.google.com
Use this option if your application is hosted on Azure and you need to send emails using Echange.

Azure App Configuration Instructions:
1. Go to Azure Portal
2. Navigate to Azure Active Directory
3. Go to "App registrations" and click "New registration"
4. Fill in the details:
- Name: Your app name (e.g., "SMTP Service Account")
- Supported account types: "Accounts in any organizational directory (Any Microsoft Entra ID tenant - Multitenant)"
5. After creation, note down:
- Application (client) ID
- Directory (tenant) ID
6. Go to "Certificates & secrets" -> "New client secret"
- Description: "SMTP Secret"
- Expires: Choose appropriate duration
- Copy the secret value immediately (you won't see it again)
7. Go to "API permissions" -> "Add a permission"
Microsoft Graph
├── Mail.Send (Delegated)
├── SMTP.Send (Delegated)
Service Account (application permissions):
Microsoft Graph
└── Mail.Send (Application)
8. Click "Grant admin consent" for your organization
9. The service account email must be licensed for Exchange Online
Azure Active Directory → Licenses
10. The service account email address is usually the one that you use to logon to Azure. See the screenshot below.

See also: