Quick jump |
Depending on the field type, this control allows uploading images and files to the database (binary field) or some directory on the Web server (text field).
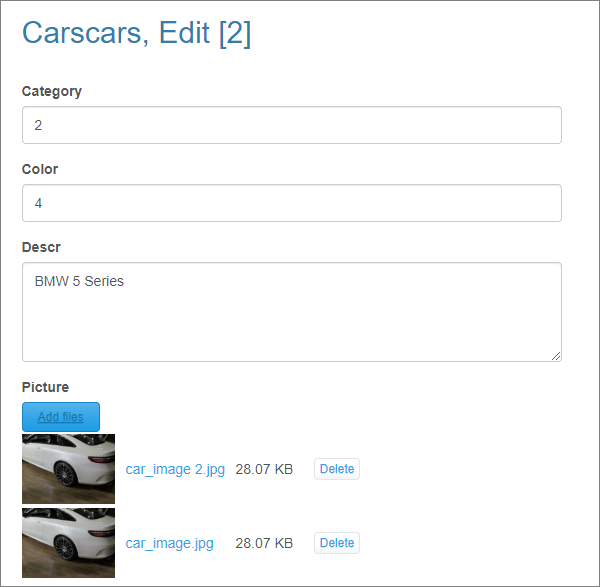
File/Image upload control allows selecting and uploading multiple files at once. You only need one database field to store all the file names. A long text field is recommended for multiple file upload, for example, Memo in MS Access, Mediumtext in MySQL, TEXT or Varchar(max) in SQL Server.
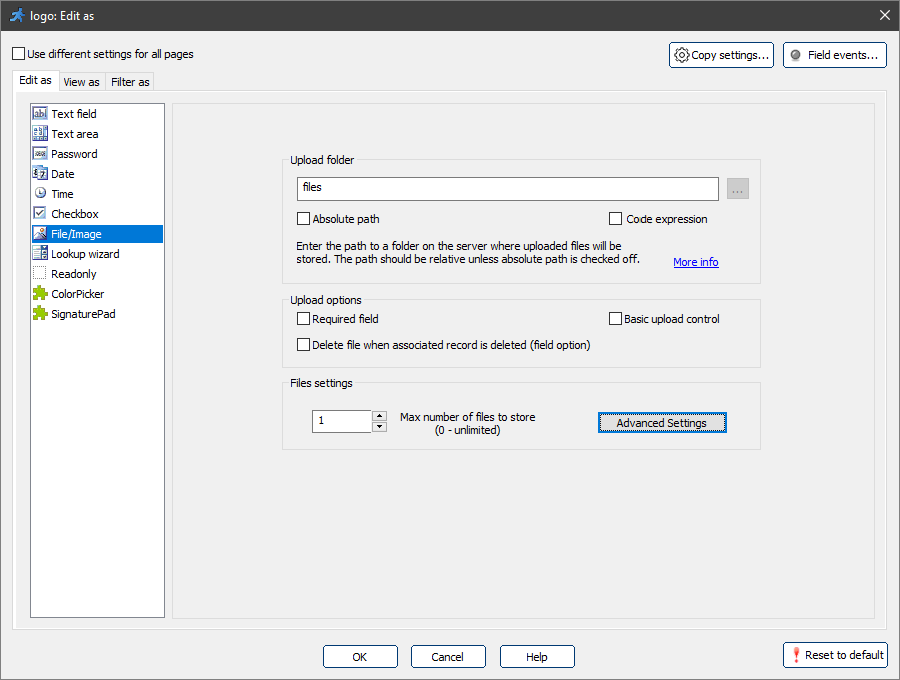
Since images and files are uploaded to some directory on the server, you need to enter the path to that directory. The path should be relative to the folder with generated pages. However, since some hosting providers do not allow referring to the directories above the current one, you can use the Absolute path option and specify the full path to the directory on the server to which to upload the files. E.g., C:\\project1\files.
The path to the upload folder may contain PHP expression (select Code (PHP) expression option). You can use this option, for example, to save each user's files to a separate folder. Sample upload path in this case is:
$folder = $_SESSION["UserID"];
Use the Delete file when associated record is deleted option to make sure that the record from the database is deleted along with the associated file. This option is global and applies to all tables and fields.
You can restrict the maximum number of files to store. Enter "0" for an unlimited number of files. Note that the default value is "1" and you need to increase it to enable multiple upload.
Enable Basic upload control option to select the old style file upload control that lets users upload one file at a time.
Note: Basic upload control will only save the name of the file in the database which the following:
1. It will not work with PHP expression Upload folder option.
2. If the user uploads a file with the same name more than once, the existing file will be overwritten.
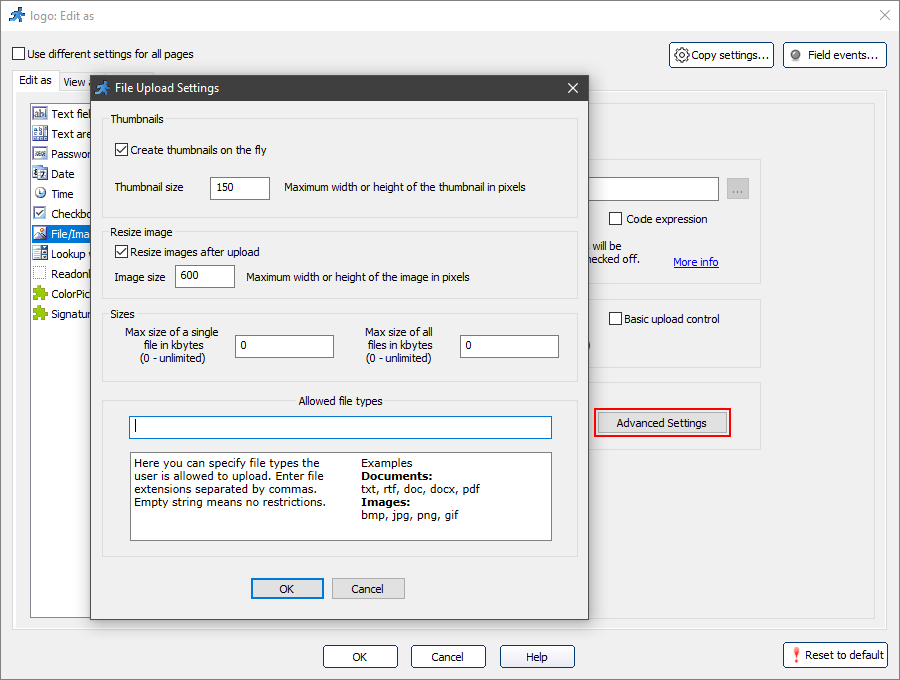
•Create thumbnails on the fly. PHPRunner allows creating thumbnails on the fly. To do this, select this checkbox and choose the thumbnail size. Thumbnail images are stored in the same folder as the images.
Note: to use thumbnails functionality, you need to have the GD library installed. On Windows you need to uncomment PHP_gd2.dll extension in your PHP.ini file.
•Resize images after upload. To resize images on upload, select this option and type in the max width or height of the resulting image.
•Sizes. You can restrict the max size of a single file or all of the files stored in the field by changing the Max size of a single file and Max size of all files fields.
•Allowed file types. Add a list of the file extensions allowed to upload in the Allowed file types section. An empty string means there are no restrictions.
Upload control in the generated app
You can drag one or more files into the upload control on the web page or add them via a browser popup window.
Note: Internet Explorer does now support the drag-n-drop feature.
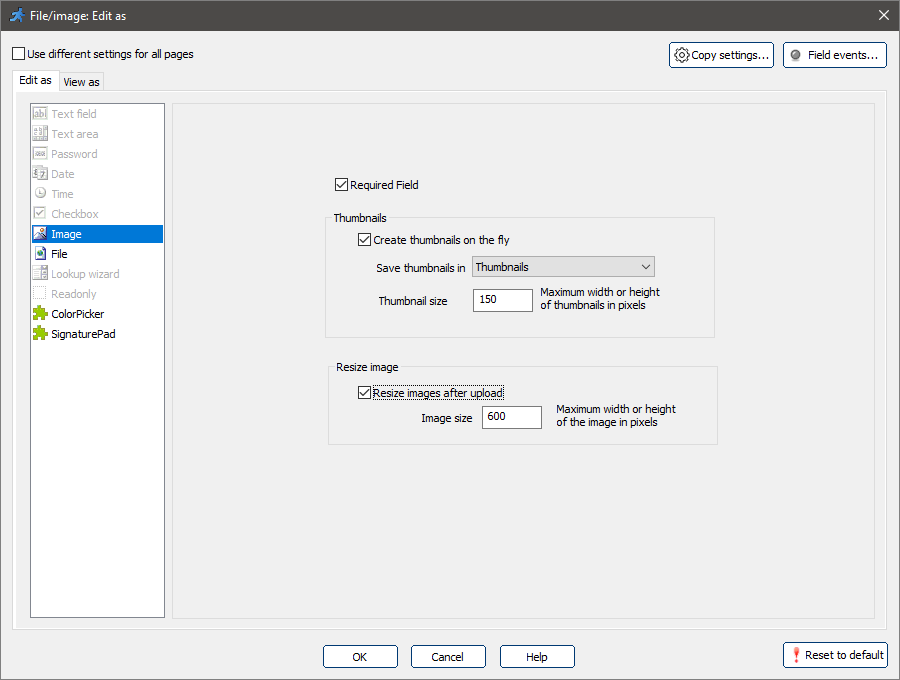
To create thumbnails on the fly, select the Create thumbnails of the fly checkbox and choose the field name in which to save the thumbnails.
Note: you need an additional binary field (MEDIUMBLOB type) to store thumbnails. This field is an auxiliary one, and we do not recommend displaying it on the pages. You can display/hide fields on the Choose fields page.
To resize images on upload, select the Resize images after upload option and select the max width or height of the resulting image.
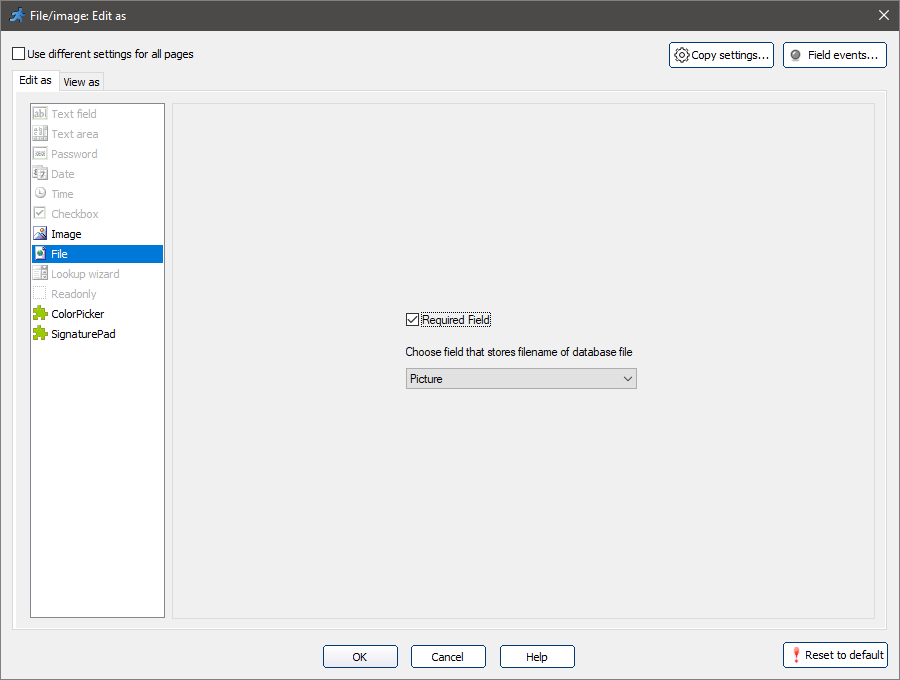
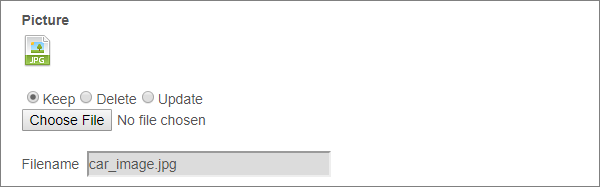
Choose the field that stores the name of the database file. This filename is required to set the correct file type when you retrieve the uploaded file from the database.
If you don't choose the filename field or leave it empty, you will see an Open with dialog every time you download this file from the database.
See also: