To upload files to an FTP server with a built-in FTP client, you need to configure the FTP location properties. Click the Upload via FTP button on the Your project was built successfully screen to open the FTP location properties window.
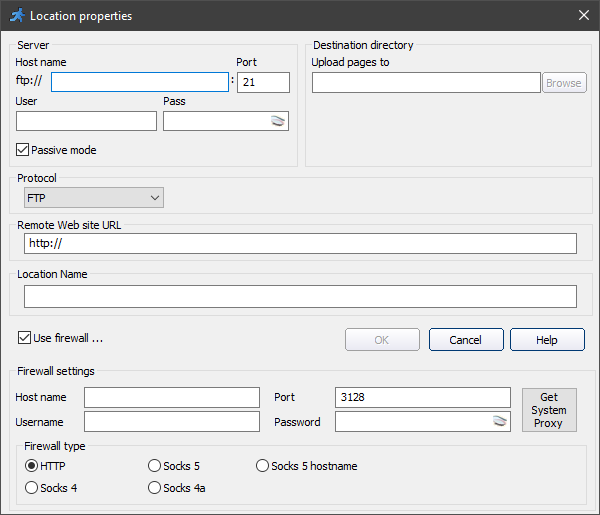
Enter the Location name, Host name, Username, and Password to enable the Browse button. Click Browse to choose the directory to upload generated files to. Choose between FTP, SFTP, and FTPS protocols.
Note: if your web hosting provider has a designated folder for databases, you need to move the database to that directory. The connection string is then updated to match the new database folder automatically.
If you have connected to the database successfully but can't create a folder or upload files, you can use the Passive mode.
Fill in Remote Web site URL, to open the application in the browser for test purposes.
Select the Use firewall checkbox to show the Firewall settings.
To upload the files, choose the FTP location and click the Upload button. You can stop the upload at any time by clicking the Stop button.
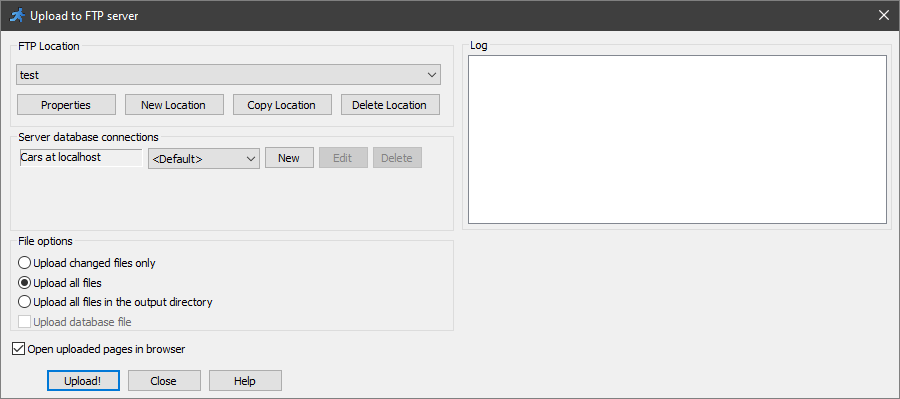
You can choose between the following File options:
•Upload changed files only - to upload the files that were changed since the previous upload.
•Upload all files - to upload all generated files.
•Upload all files in the output directory - to upload all files including the files that were not created by ASPRunnerPro.
Note: you can increase the upload speed by changing the number of FTP threads. Click Project -> Settings to open ASPRunnerPro settings and change the number of FTP threads.
See also:
•Using a third-party FTP client to publish the application
•Testing the mobile version of your web app