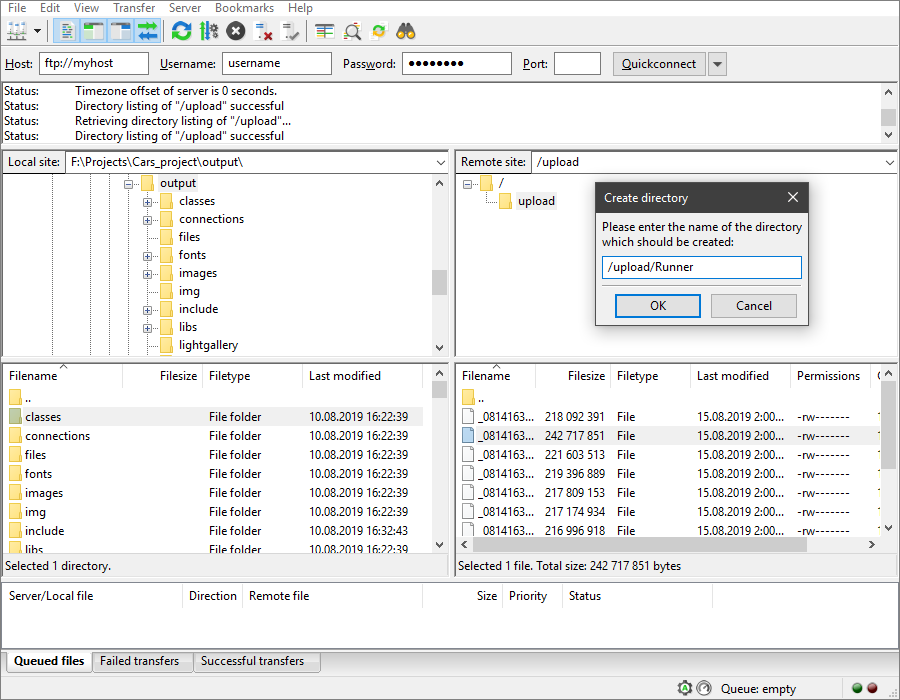
After you have built an application with ASPRunnerPro, you may use any FTP client to upload it to a remote server. Here is how you can do it using FileZilla.
First of all, you need to connect to the remote server. Fill in the Host, Username, Password, Port fields and click the Quickconnect button.
Note: you can see the connection status in the panel below the Quickconnect button.

The left panel represents your local files/site. Open the Output folder of your project in the local files.
Note: to learn more about the output settings, see Output directory settings.
The right panel represents the remote server file structure. Create a new folder for your project on the remote server - right-click anywhere in the bottom-right panel and select Create new directory and enter it.
Once you opened both folders (local and remote), select all local folders and files in the output directory, right-click on them and select Upload. The selected files are added to the Queue and uploaded to the remote server.
When the contents of the Output folder have been copied to the remote server, open the browser, type in the name of your website and add /%name of the folder you made% after it. In our example, the URL looks like this: https://www.xlinesoft.com/upload/Runner/.
See also: