Upload to Google Cloud Storage
This article show how to configure ASPRunner.NET to upload files to Google Cloud Storage service.
1. Create a Storage Bucket
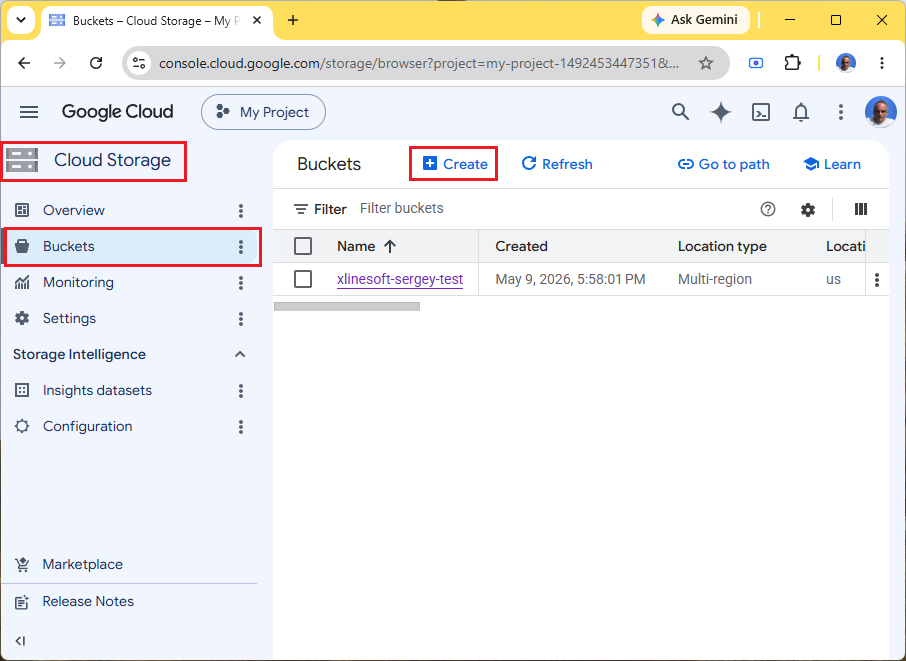
1. Open Cloud Storage → Buckets
2. Click Create
3. Fill in:
•Bucket name (must be globally unique)
•Region
•Storage class (usually Standard)
Other options can keep default values. Finish bucket creation.
2. Create Access Keys (S3-Compatible HMAC Keys)
Google Cloud Storage supports authentication via HMAC keys.
Open:
Cloud Storage → Settings → Interoperability
or directly: Cloud Storage Interoperability Settings
Create HMAC Key
Under Interoperability сlick Create a key for a service account
You may either choose an existing service account or create a new one.
Permissions
When you create a new account enter its name and click 'Continue'. Expand permissions. Type 'storage' into a search box and select 'Storage Admin'. Click Continue.
After creation you will receive:
•Access key
•Secret
Example:
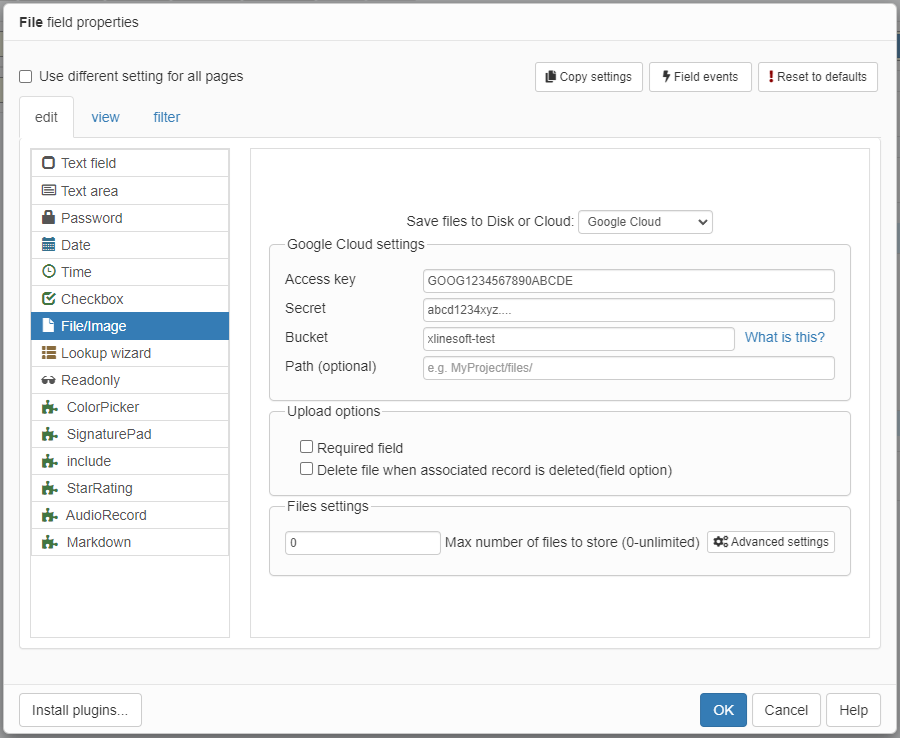
Access Key:
GOOG1234567890ABCDE
Secret:
abcd1234xyz....
Save the secret immediately — Google only shows it once.
3. Configure CORS
Required for browser uploads/downloads from JavaScript.
Open the bucket:
Buckets → your bucket → Configuration → CORS (Cross-origin resource sharing)
Allow Cross-origin resource sharing, click 'Add configuration'.
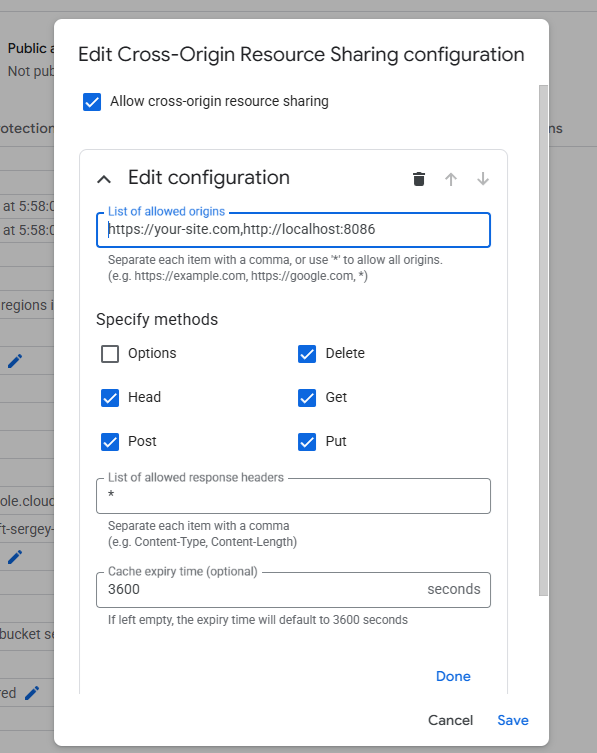
Save changes.
4. Setting it up in ASPRunner.NET
Now select a text field in the Page Designer, proceed to 'Edit as' settings, set 'Edit as' type to File/Image and select Google Cloud under 'Save files to Disk or Cloud' dropdown box.