The Audit trail window allows you to configure logging options and record locking on the Edit page.
Press the Locking and Audit button on the Security screen to open the Audit trail popup.
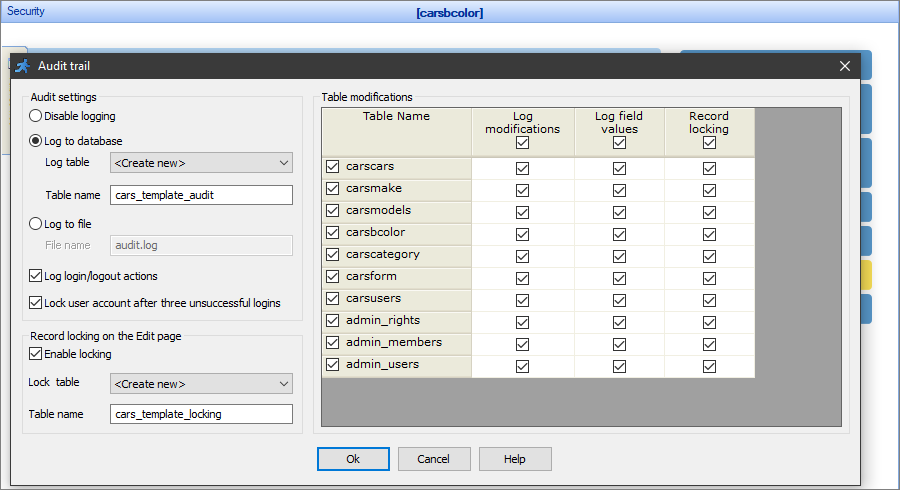
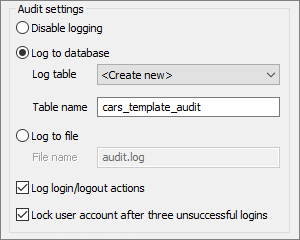
The Audit settings is a section dedicated to logging.
A log is a record of user actions like login/logout/adding/editing/deleting records. The logging is disabled by default.
To enable logging, select one of the options:
•Log to database. Select a table to store the log or create a new one. You can set the name for the new table.
•Log to file. Enter the log File name, for example, audit.log. By default, the log files are saved to the root folder of the project. You can enter the File name as <folder>/<file name> to change the location of the log file. For example, if you set the File name to log/audit.log, the log files will be saved to the %root folder of the project%/log.
Note: PHPRunner creates new log files each day, so the log file names look like this: %file_name%_yyyymmdd.log.
You can also select the Log login/logout actions and Lock user account after three unsuccessful logins checkboxes to enable the corresponding actions.
Note: the Lock user account after three unsuccessful logins option is available only if you selected Log to database.
Select the tables to which to apply the modifications or field values logging in the Table modifications section.
Here is an example of a log file:
Date Time IP User Table Action Key field Field Old value Field New value Jul 23,2019 18:13:56 127.0.0.1 user carsusers login Jul 23,2019 18:14:20 127.0.0.1 user carsbcolor edit 25 color Simple Black Full Black Jul 23,2019 18:14:44 127.0.0.1 user carsbcolor add 26 color Basic White Jul 23,2019 18:14:44 127.0.0.1 user carsbcolor add 26 rgb #FFFFFF Jul 23,2019 18:14:44 127.0.0.1 user carsbcolor add 26 OwnerID 3 Jul 23,2019 18:14:53 127.0.0.1 user carsusers logout Jul 23,2019 18:14:55 127.0.0.1 admin carsusers login Jul 23,2019 18:14:59 127.0.0.1 admin carsusers logout |
Note: to analyze information from the log table, you can add a report or chart to your project, or use the online report/chart builder.
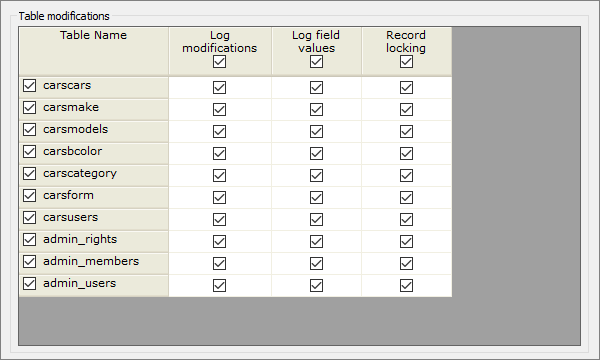
This is the section where you can fine-tune the logging and record locking.
Select the corresponding checkboxes to enable logging modifications, logging field values, or record locking for the tables of your choosing.
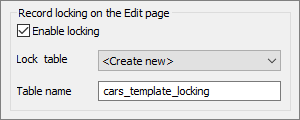
This section allows you to enable the record locking to prevent situations when users simultaneously edit the same record. While one user is editing the record, it becomes locked, so other users can't change it. The record locking is disabled by default.
To enable record locking, select the Enable locking checkbox. You also need to choose an existing table to store the locking data or create a new one. You can set the name for the new table.
Select the tables to which to apply the record locking in the Table modifications section.
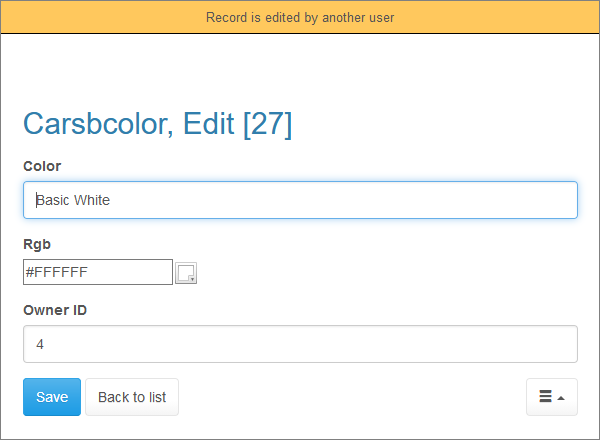
PHPRunner shows the following message to any user who tries to edit the locked record:
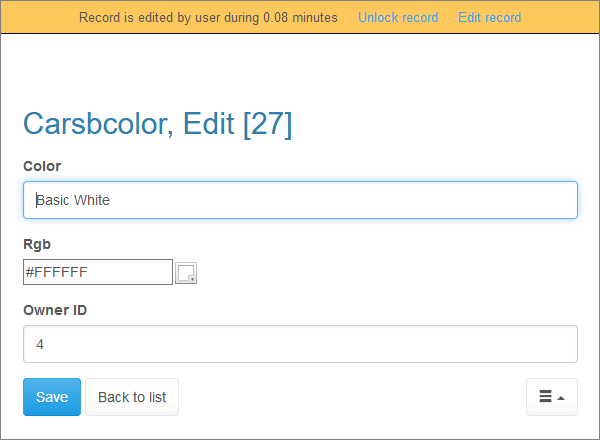
Note: administrators can unlock the record (the user receives a message, that admin aborted the edit session) or edit it (the user receives the standard message):
If a user goes to the Edit page and then clicks Back in the browser, the record remains blocked. To prevent this, PHPRunner utilizes an automatic unlocking method. By default, the record is unlocked after 550 seconds. You can change this value by editing two parameters in the file include/locking.php:
var $ConfirmTime = 250;
var $UnlockTime = 300;
The variable ConfirmTime determines the interval (in seconds) between requests for confirmation that the user hasn't left the Edit page (i.e., checking if the record is still locked).
The variable UnlockTime determines the time (in seconds) after a failed confirmation when the record is unlocked automatically.
Security screen articles:
•CAPTCHA on authentication pages
See also: