Quick jump |
|
|
|
The aim of this step-by-step guide is to help you get an idea about ASPRunnerPro and its main features. After reading it, you will be able to create your project promptly and smoothly. You can always open the help file by pressing the Help button on the navigation bar.
Note: if you prefer videos check our video tutorials page
Start working with the projects
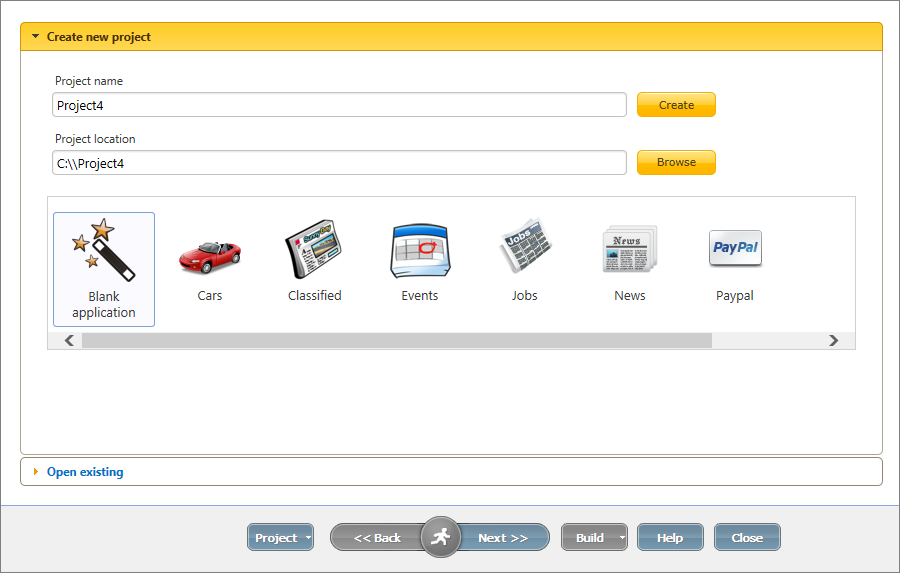
ASPRunnerPro provides an option either to create an application from scratch or to choose one of the application templates. Choose Blank application if you want to build the project from scratch. Otherwise, you can select one of the predefined templates. Templates are pre-made sample projects and they also create all the required database tables for you.
See also:
You can navigate ASPRunnerPro by using the bottom panel and clicking Back or Next to move between the screens.

See also:
ASPRunnerPro supports all popular databases: MySQL, MariaDB, Microsoft SQL Server, Oracle, MS Access, DB2, PostgreSQL, and more. Select the type of the database you are going to use.
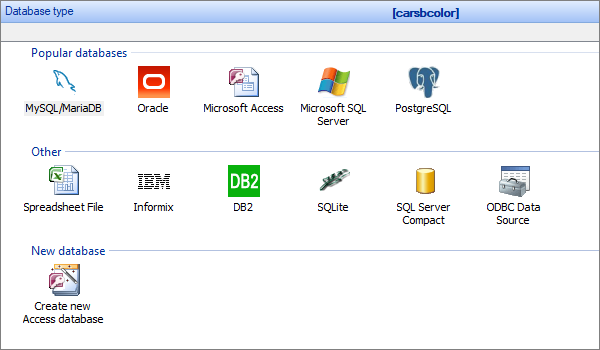
Note: If you do not have a database server or web server, see Internet Information Services (IIS).
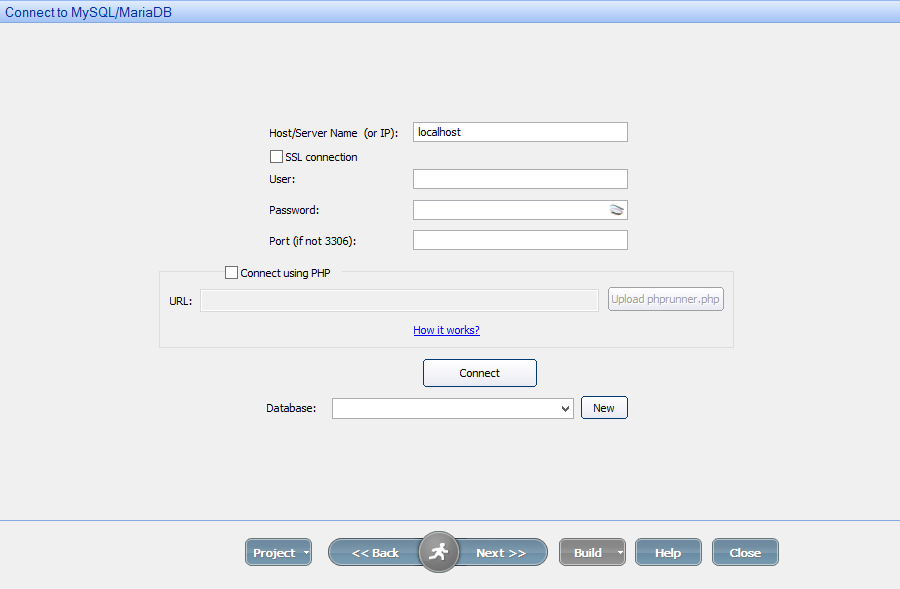
Then you should provide the database connection credentials. You have an option to select an existing database or to create a new one.
See also:
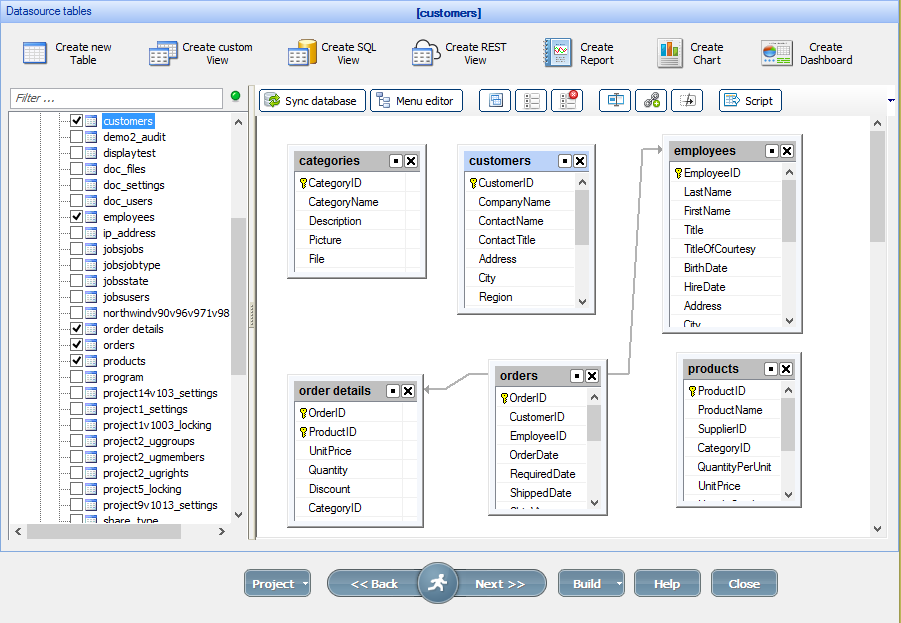
In ASPRunnerPro, you can modify the tables, fields and the database structure, as well as create new tables, queries, and relations between them.
You can also create dashboards, charts, and reports on the Datasource tables screen to present your project data in a user-friendly way.
See also:
•Master-details relationship between tables
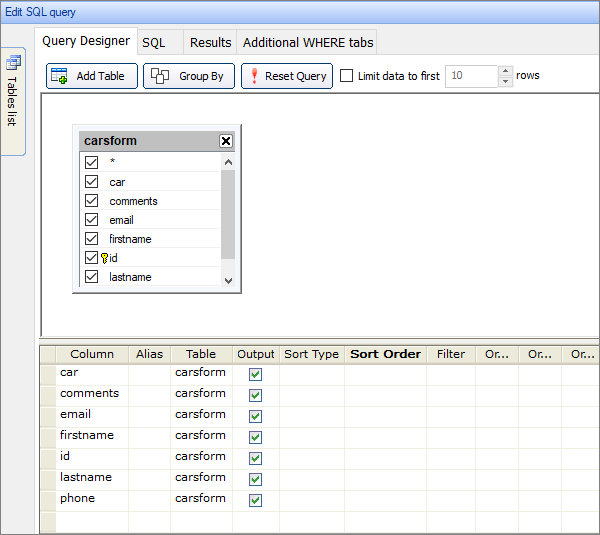
This screen provides options for modifying the database and the tables using SQL queries. You can generate SQL queries via Query Designer, or write the code on your own. Using the Query Designer can help you sort and filter your data, create aliases to the fields, and control the data output on the pages. You also can preview the Results and create Additional Where clauses.
See also:
•SQL
On the next screen - Pages, you can choose what pages to build for each table. You can also set additional options, for example, show Add/Edit/View pages in a popup or freeze the header of the grid on the List page.
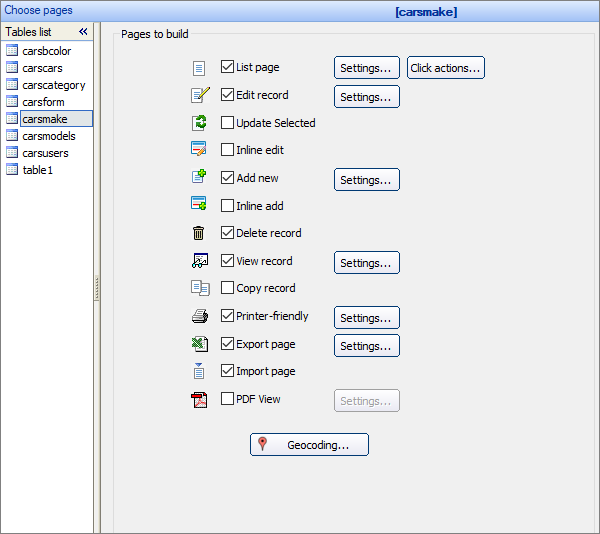
Note: Make sure to select a proper key column. A key column is used to identify table rows, so, the key values must be unique for each record.
See also:
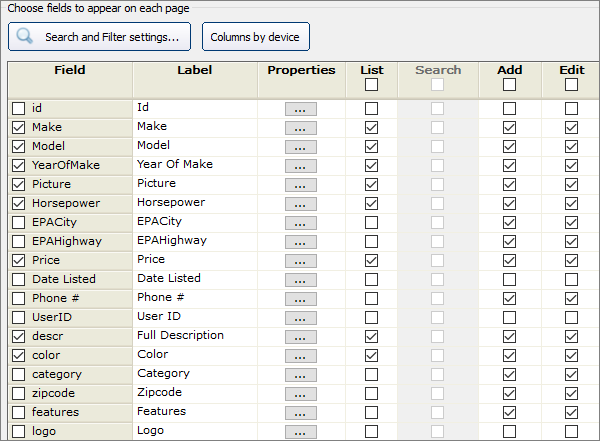
On this screen, you may choose the fields to appear on each page. Do this by selecting the respective checkboxes. You can also configure Search and Filter settings and set up different columns for different device types.
See also:
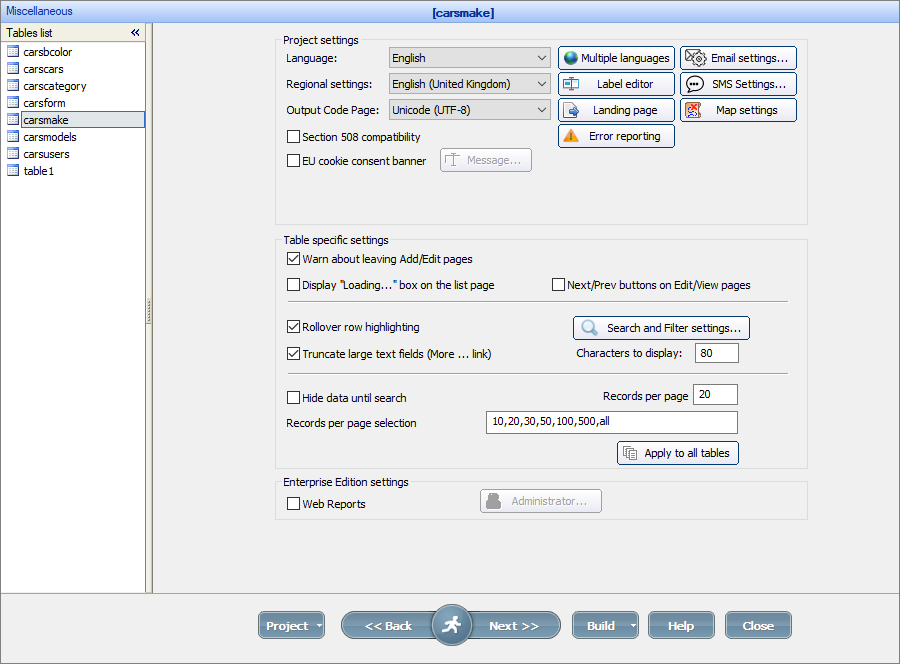
Proceed to the Miscellaneous settings screen to configure the projects settings, such as application language, map settings, notifications, SMS and email settings, as well as the Table specific settings, such as number of records per page, Search and Filter settings, and add Next/Prev buttons on Edit/View pages.
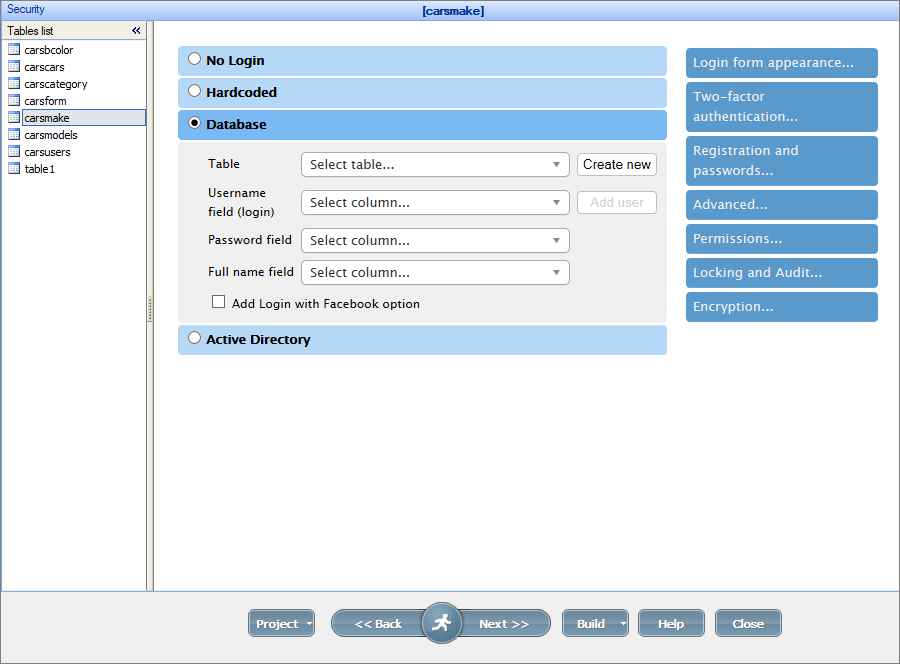
Proceed to the Security screen to configure the user registration and authentication system, as well as to restrict access to the database. You can set up a hardcoded login/password combination, or you can store it in the Database, or even use Active Directory.
You can also regulate access to the specific tables and pages via User Group Permissions.
Visual appearance customization
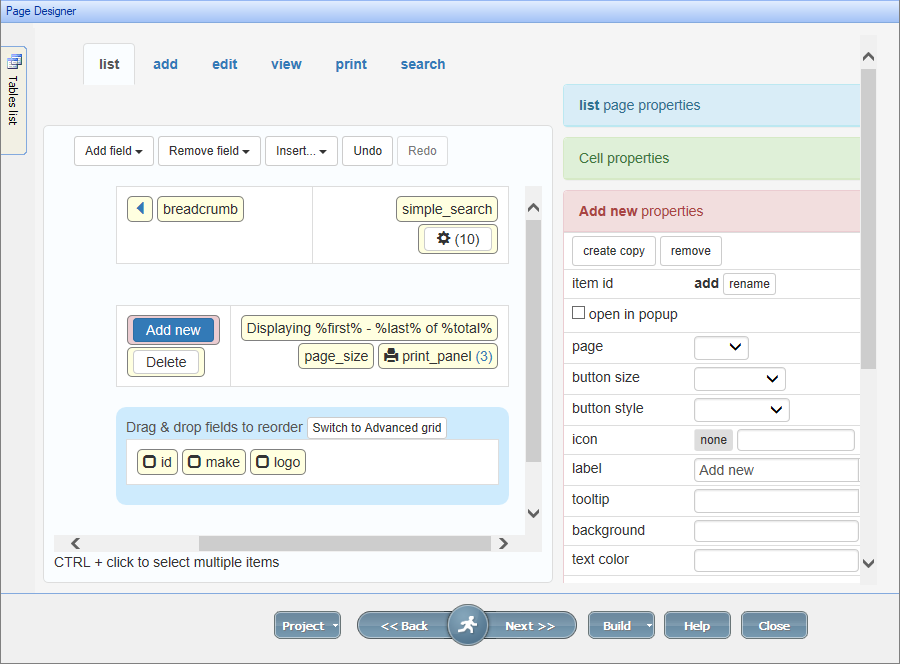
The next step is the visual appearance customization. On the Page Designer screen you can customize and position the elements, and set the layout and grid type of the pages.
The Editor screen displays the previews of the pages. You can select a theme, set the size of the elements, add custom CSS code, edit the menu, and view the page as HTML.

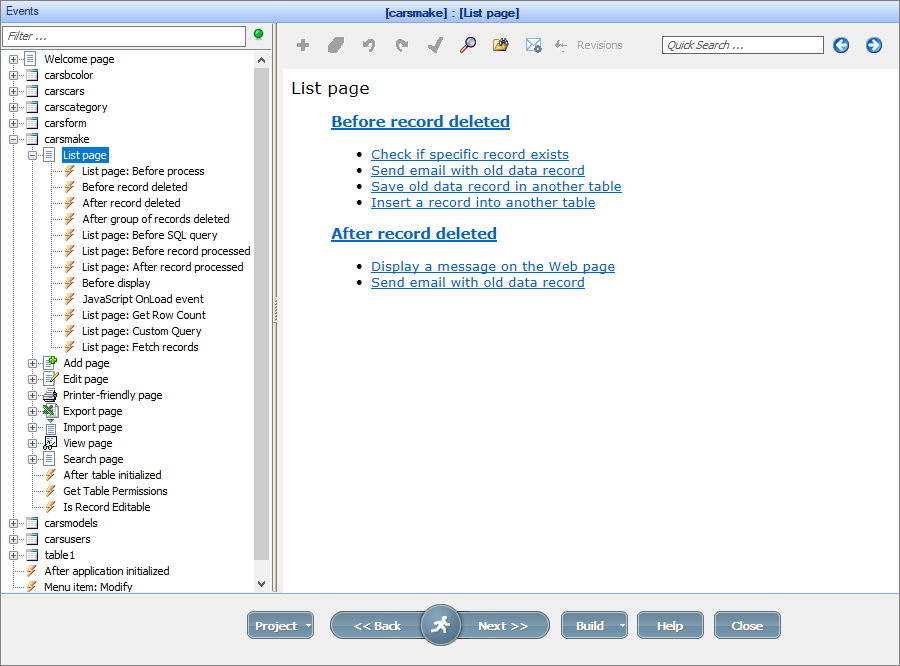
You are able to extend the functionality of your application - by adding your code to Events. Events are actions that are performed automatically when certain conditions are met, for instance: a record was added to the database, or the user opened the List page.
You can use sample event code snippets or write the code on your own.
See also:
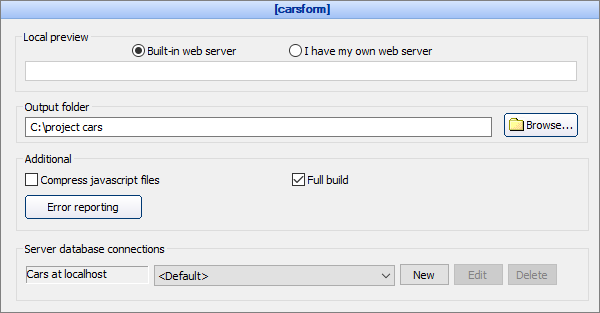
Proceed to the Output screen to select the project output directory - a place to store your project files.
You may use the built-in Apache web-server or a custom one to preview the project locally.
You can also configure the Server database connection.
See also:
•Internet Information Services (IIS)
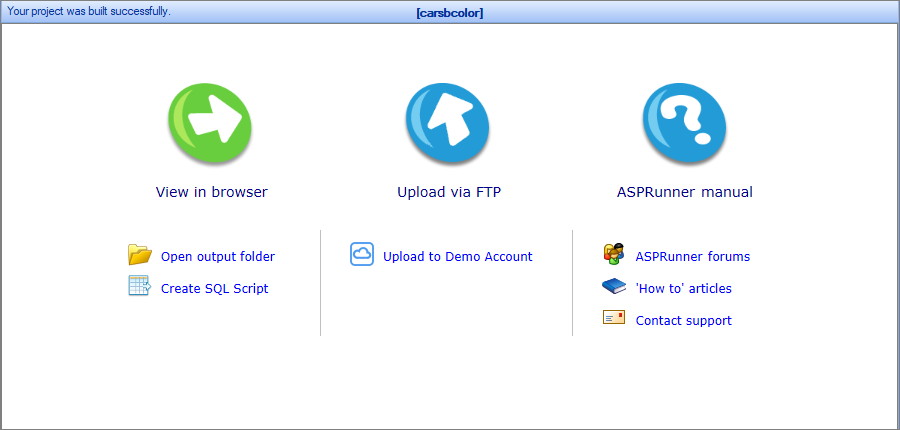
As soon as everything is completed, you are ready to build! Now you can preview the application in the browser and start testing it. Moreover, you have options to Open output folder of the project or Create SQL Script.
Share your application with other people - publish your project using the Demo Account provided by ASPRunnerPro free of charge. You can also upload the files to your web server using a built-in FTP client or any third-party FTP software.
See also:
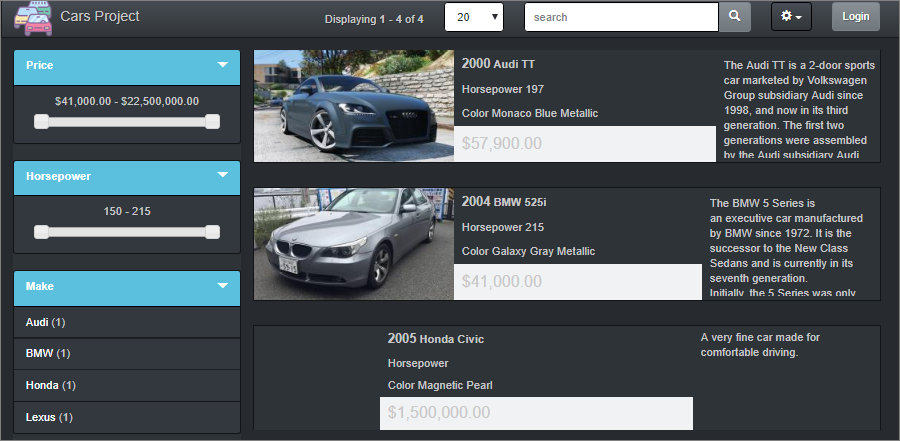
Have a look at a sample page created with ASPRunnerPro.